Hello~o~同学们,欢迎回到趣闻屋!
这是趣闻屋学习AI艺术第二期学习过程——AI绘画图生图(img2img)
这篇AI图生图文章是笔记也是为与同学们分享,给大家提供一些启发和帮助。
好好学习,天天向上!
话不多说,咱们开始吧~
(本文总字数7000字,建议同学们收藏下来慢慢看)
Stable diffusion 图生图(img2img)能做什么?
1. 图像重构:可以根据重绘程度值的调整,保留构图改变原图整图或部分细节。如:
(1) 换人脸,换服装
(2) 修改变形手脚,人脸
(3) 去除多余的手脚、人物、文字、水印
(4) 抠图、去背景
2. 放大图像:将低分辨率原图像转换成高分辨率图像,提升原图清晰度和细节。
原图256*256放大到1024*1024,可选择原图方法,也可通过重绘值让AI添加细节
3. 视频插值:可配合脚本对动作插值,生成动画和连续图像序列,从而生成流畅的视频。
4.风格转换:更换原图风格,创造出新的图像效果。如:
(1) 油画风格转换成水墨风格
(2) 赛博朋克风格转换成二次元风格
(3) 真实风景转换成漫画风景
5.图像修复:可以修复照片中的损坏、噪声和瑕疵,从而提升图像的质量。
1.老张片修复
2.去除马赛克等
6.增加物件:可通过涂鸦的方式,可控的给原图增加更多细节。如:
(1) 单调的背景里,想增加一个摆件、挂饰
(2) 桌子上增加一个咖啡杯、一本书
(3) 衣服上增加一个口袋、印花
(4) 头发增加发卡
(5) 增加一个人
7.草图上色:给SD一张草图,AI可以根据草图的形状和提示词,绘制出高质量的图像。如:
(1) 给一只乌龟的草图
(2) 一只鸟的线稿
(3) 人物的素描
图生图可以做很多事情,趣闻屋这里只是列举极小部分想法而已。同学们请自行发挥你自己的想象和创意。有好玩的也请在评论区分享哦。助人为乐,天天开心~
图生图(img2img)及基本参数详解
1.提示词和反提示词,依然跟文生图里的一样,界定图片生成方向的(没看过的小伙伴,可移步到趣闻屋主页-《Stable Diffusion 文生图经验分享》)。
2.CLIP反向推导提示词(Interrogate CLIP)和 (Interrogate DeepBooru)反向推导提示词

反向推导提示词,意思是让SD反向推导出提示词。
他们什么区别呢?
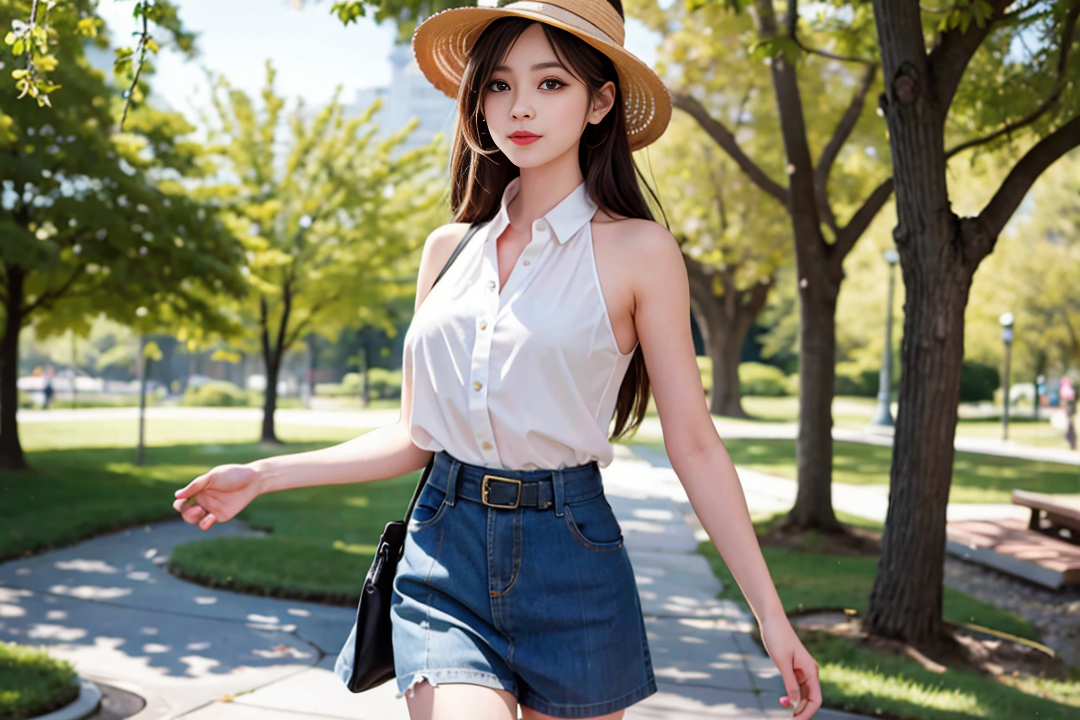
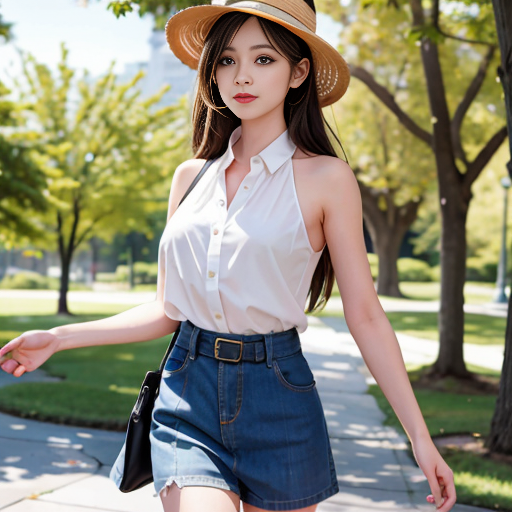
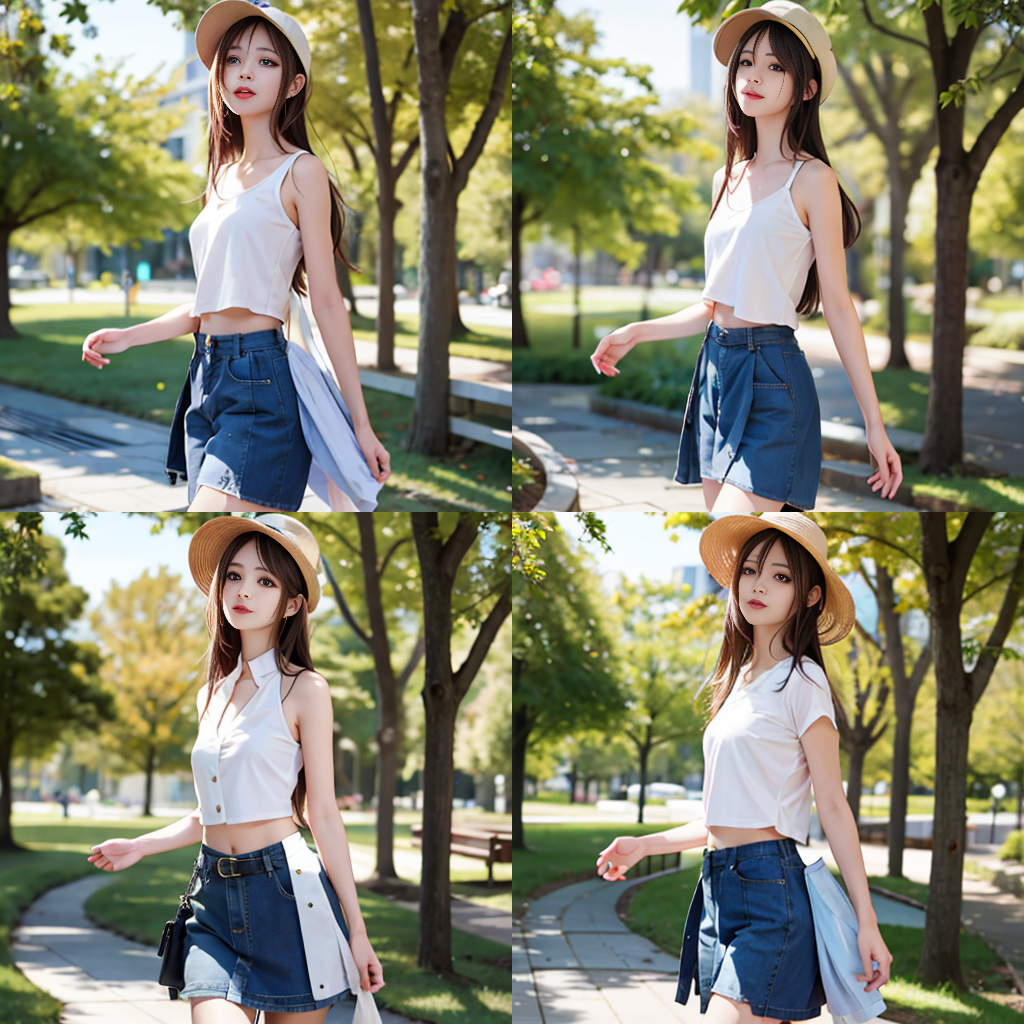
我们来看个栗子,如下图大漂亮:
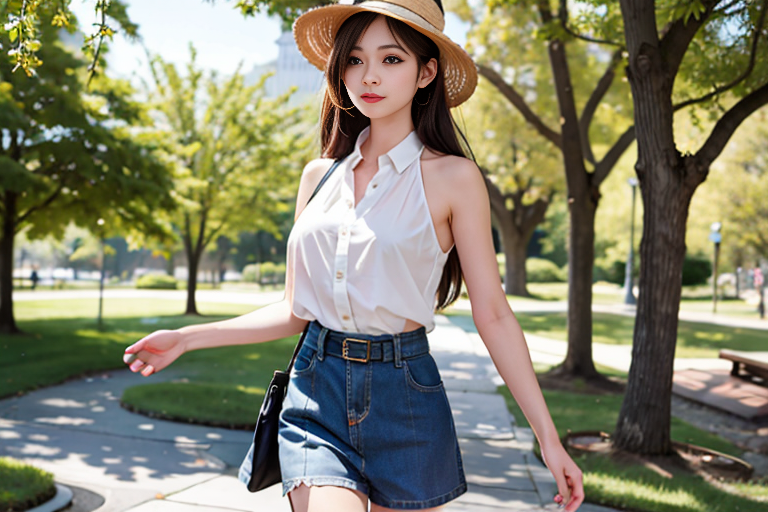
点击【Interrogate CLIP】 得到如下提示词:
a woman in a hat and a skirt walking down a sidewalk with a suitcase in her hand and a handbag in her other hand, Fan Qi, hourglass slim figure, a statue, aestheticism
戴帽子和穿裙子的女人走在人行道上,一手提箱,一手提包,范琪,沙漏形苗条身材,雕像,唯美主义
点击【Interrogate DeepBooru】 得到如下提示词:
1girl, bare arms, bare shoulders, bare tree, beach, belt, blue_sky, blurry, blurry_background, blurry_foreground, branch, bush, day, denim, depth_of_field, dutch_angle, fence, hat, lips, long_hair, looking at viewer, motion_blur, nature, outdoors, palm tree, park, path, photo_background, road, shirt, shorts, sleeveless, solo, standing, sun_hat, tree, tree_shade
一个女孩,裸露的手臂,裸露的肩膀,裸露的树,海滩,腰带,蓝天,模糊,背景模糊,前景模糊,树枝,灌木,白天,牛仔布,景深,荷兰角,栅栏,帽子,嘴唇,长发,看着观众,运动模糊,自然 ,户外,棕榈树,公园,小路,照片背景,道路,衬衫,短裤,无袖,单人,站立,遮阳帽,树,树荫
对比看出,他们区别在于:【Interrogate CLIP】是以人类说话的语气,再加上点缀来合成文本。而【Interrogate DeepBooru】则是以词组、标签的方式。
趣闻屋觉得【Interrogate DeepBooru】的方式更详细,可控性也好,也是趣闻屋常用的方式。同学们可以根据自己的思维习惯自行选择,哪个用着习惯就用哪个,也可以轮换的使用。有位伟人说过:不要拘泥于一树,要敢于尝试!大家一起把大拇指竖起来~
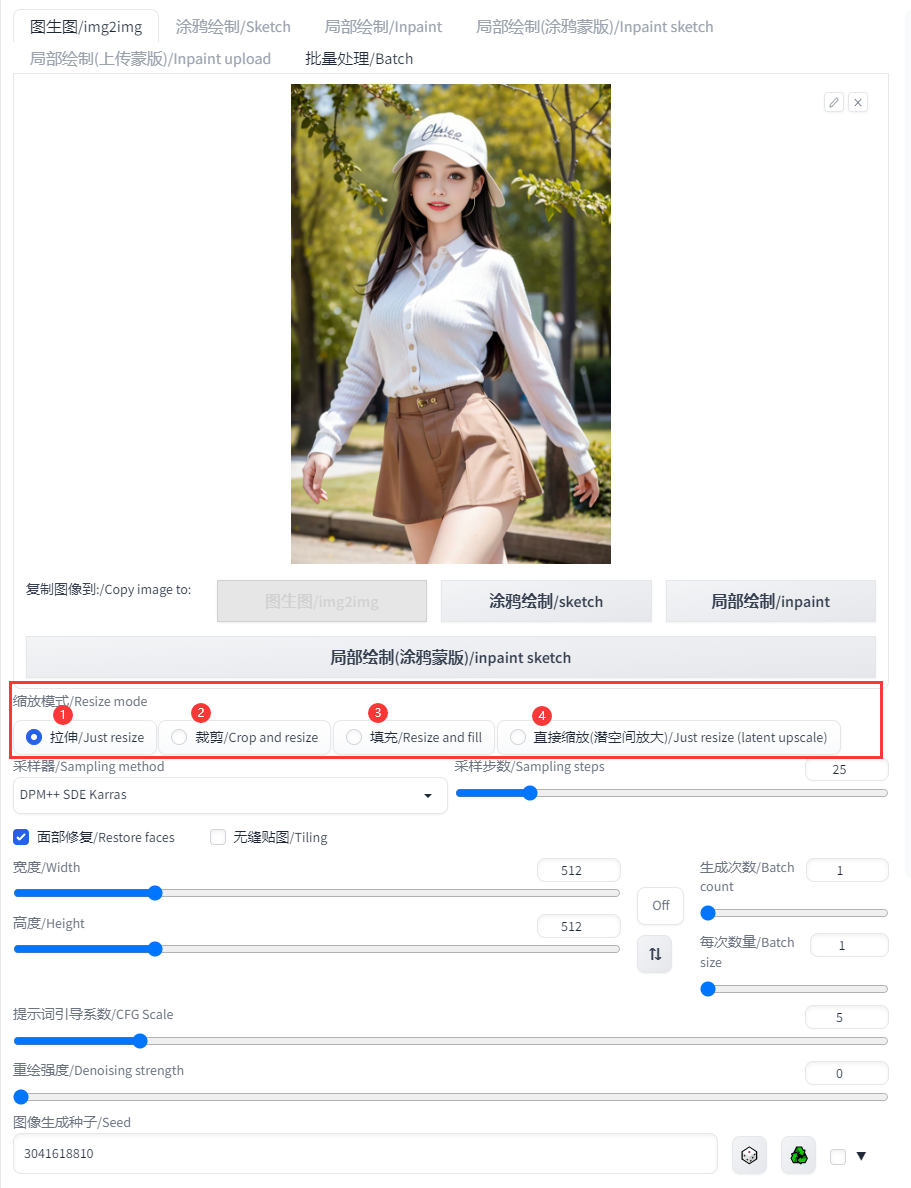
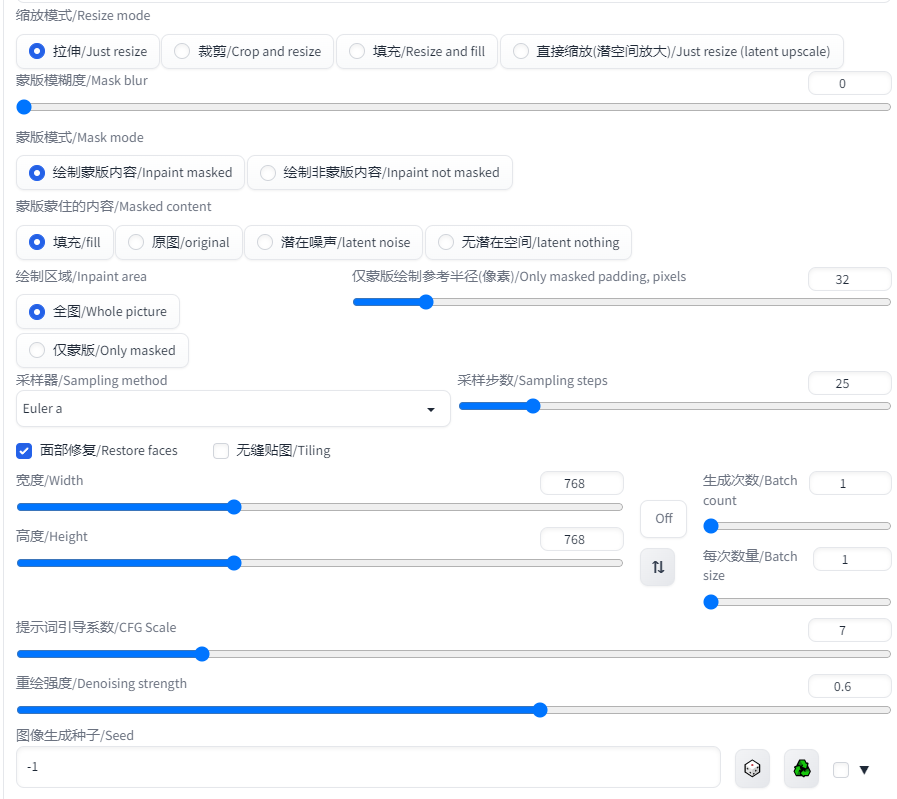
3.缩放模式(Resize mode)
在图生图的过程中,缩放模式非常重要,可以根据不同的缩放模式,得到不同的转换效果。简单介绍:
拉伸(just resize):只简单的缩放图像大小,不进行任何的裁剪或填充操作,转换后的图像可能会出现拉伸或压缩的情况,导致部分细节丢失或变形。
裁剪(crop and resize):先对原图进行裁剪,再进行缩放,能够减少失真,保留更多的细节。但是由于裁剪的操作,比例不同会让图像丢失一些内容。
填充(resize and fill):先对原图进行缩放,然后再对图像进行填充。这种模式可以保留整个图像的比例,不会丢失过多的细节,但是填充的内容可能会影响视觉效果。
潜空间缩放(Just resize (latent upscale)):该模式是在前向传播过程中进行了大小变换,缩小输入优势,不能准确恢复原图的细节,但是能获得更高的速度和更好的稳定性。但对比例的要求高,同时宽高值必须能对8整除。
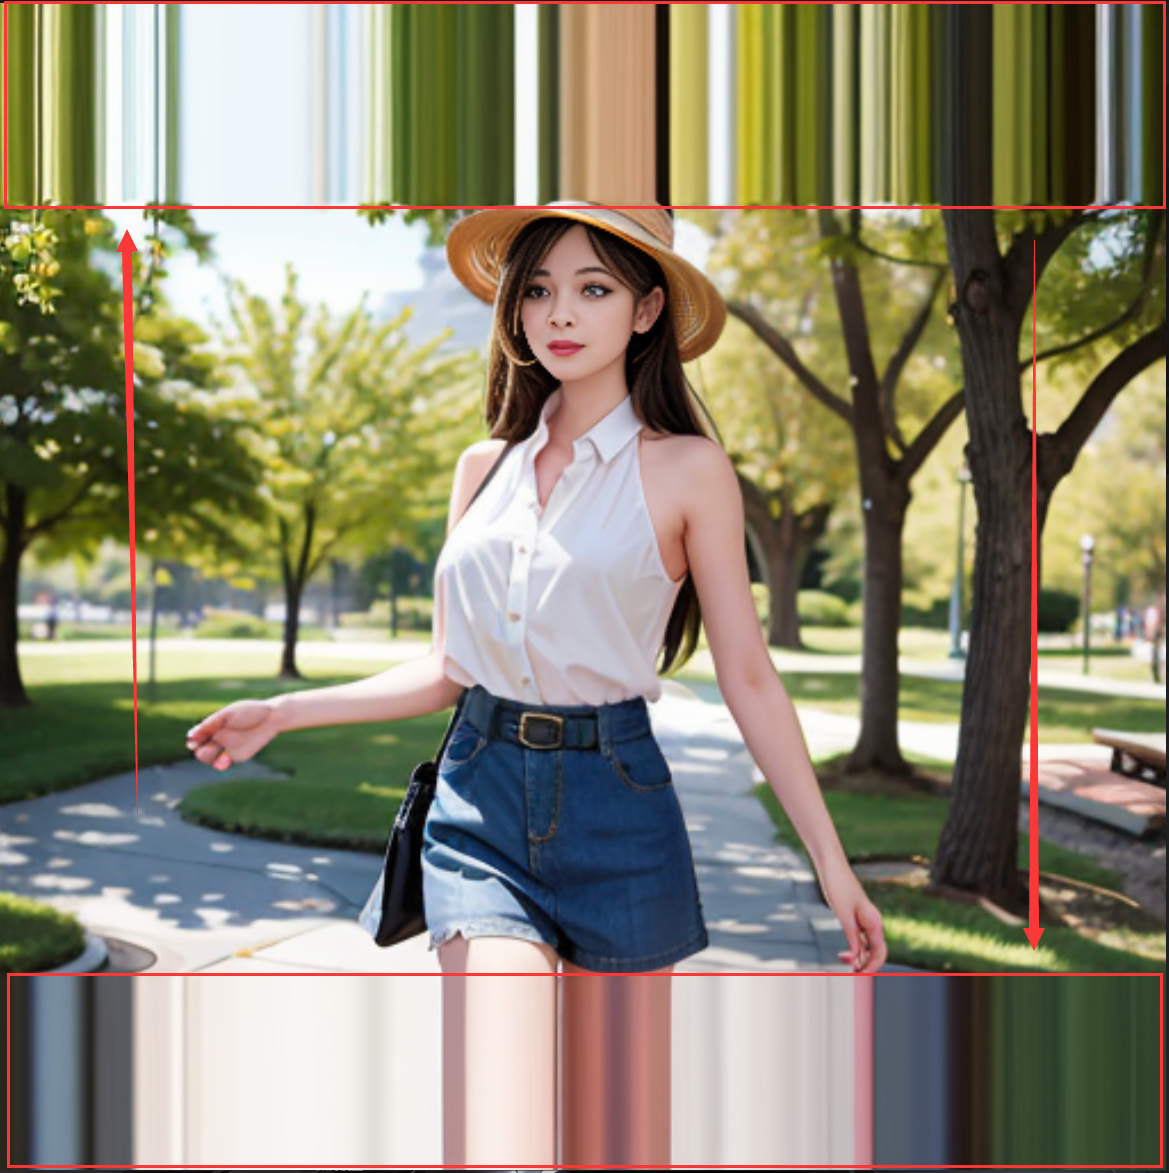
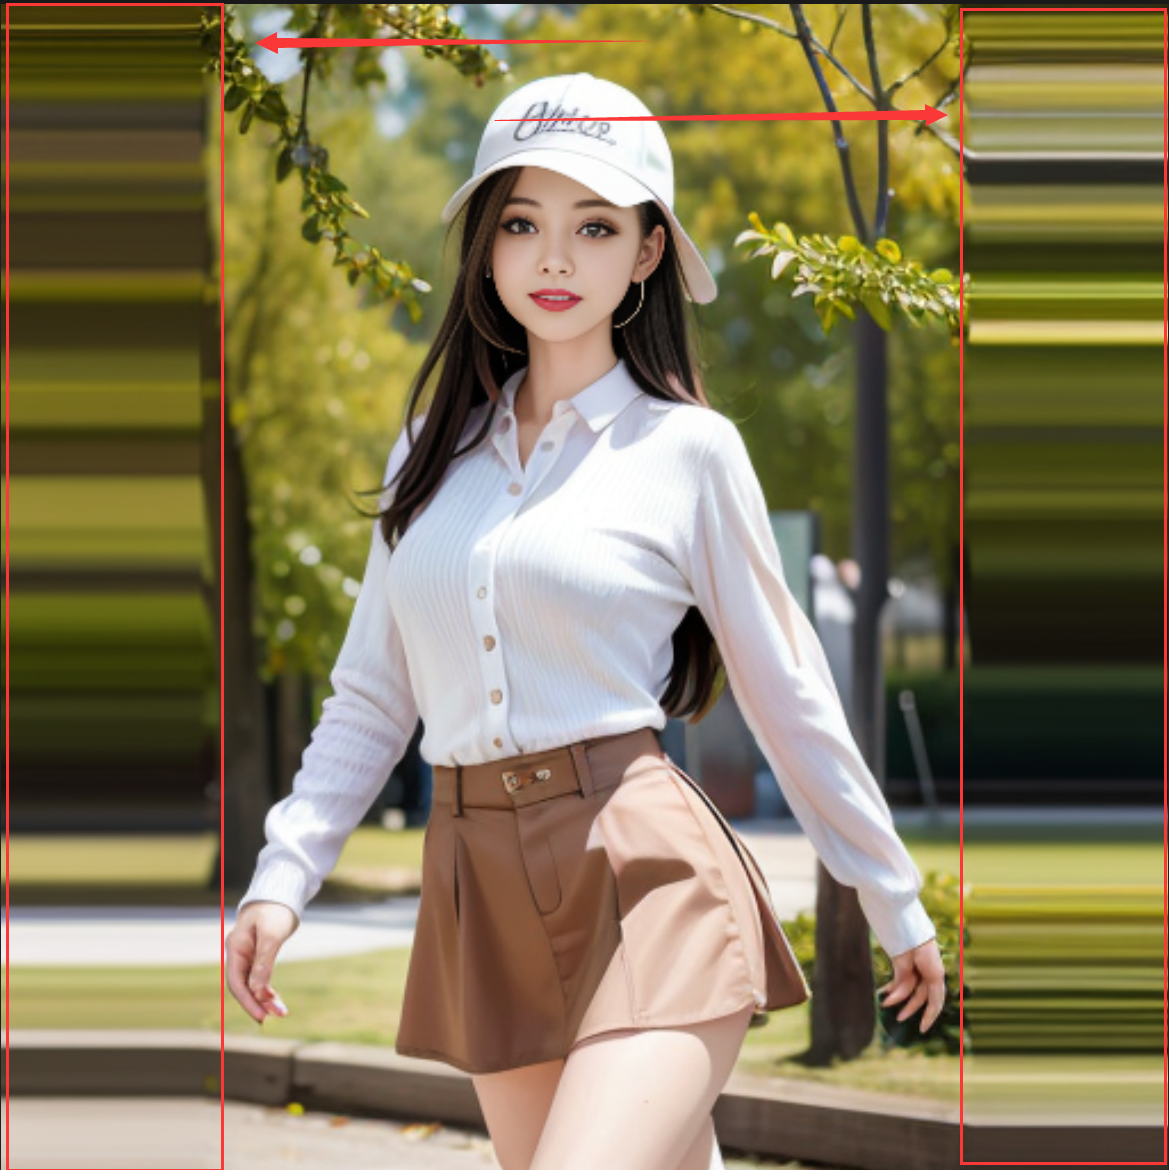
四种缩放模式对比效果如下,趣闻屋采用两个样例作对比,分别是
1.宽高1080*720尺寸输出512*512,横版图
2.宽高720*1080尺寸输出512*512,竖版图
横版,1080*720:
竖版,720*1080
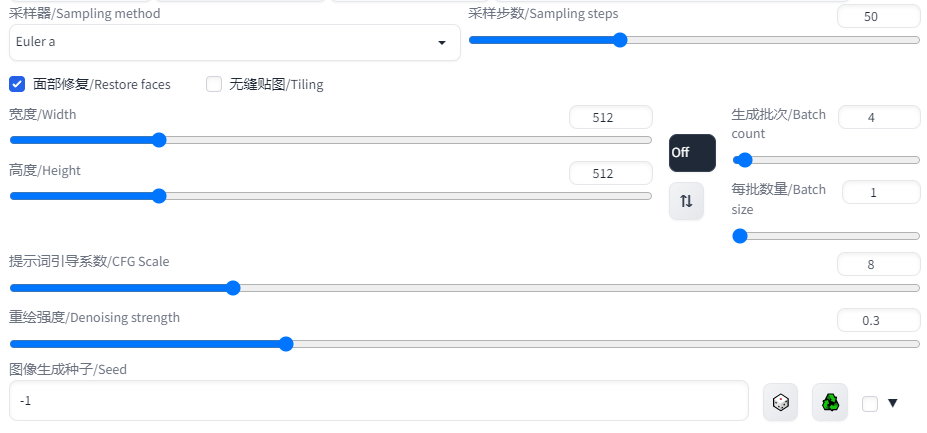
参数设置:
Steps: 25, Sampler: DPM++ SDE Karras, CFG scale: 5,
Face restoration: CodeFormer, Size: 512x512,
Model: Guofeng3_v33,
Denoising strength: 0
输出,512*512:
(1) 拉伸(Just resize) 缩放下, 改变了人景比例,出现变形:


(2) 裁剪(Crop and resize) 缩放下,被裁减掉超出输出尺寸的(左右/上下)两边部分内容:
横版图,裁剪掉左右两边内容:
竖版图,裁剪掉上下两边内容:

(3) 填充(Resize and fill) 缩放模式下,填充小于尺寸的(左右/上下)两边部分内容,先缩放再填充:
扩展:原操作填充的内容有点辣眼睛。小伙伴们可使用脚本【outpainting mk2】,是一个扩展绘画脚本。也可以参考趣闻屋的另一篇,细节增强文章:AI绘画提高细节技巧
链接:
https://www.toutiao.com/article/7222595680299532833/
(4) 潜空间缩放[Just resize (latent upscale)],这个缩放方式跟拉伸相似,也是通过拉伸的方式来对图片尺寸做调整,但采样的地方是在潜空间进行,所以得到的图片会有很大的随机性。
总结:4种缩放模式,各有优缺点。同学们请根据业务需要自行选择。SD裁剪和填充的方式固定,也就是等宽高。同学们想要自定义填充的比例,可以用PS等外部工具进行简单绘制,再放到SD。惊喜不断噢。
4.采样器、采样步数、宽高等这些参数。文生图那边有很详细的介绍和对比,趣闻屋在这就不再介绍了。
电梯:文生图学习分享
地址:
https://www.toutiao.com/article/7217327151022899767/
5.重绘强度(Denoising strength)
重绘强度(Denoising strength)也称为降噪强度,是控制出图与原图相似度的参数。数值范围:0-1。为0时,产出图与原图相似度最高;为1时,与原图相似度最低。
以下是重绘强度0-1每隔0.2对比图:

图片可以看出:Denoising从0.4开始就有很明显的细节变化,0.6容貌表情,0.8的时候动作开始改变。同学们想要跟原图细节更相似的Denoising调低,反之调高,想随机一下,就调到0.5-0.6之间。
趣闻屋在修图时,喜欢把Denoising调到0.55,然后通过inpaint模式绘制蒙版进行微调。
6.图生图实例应用:
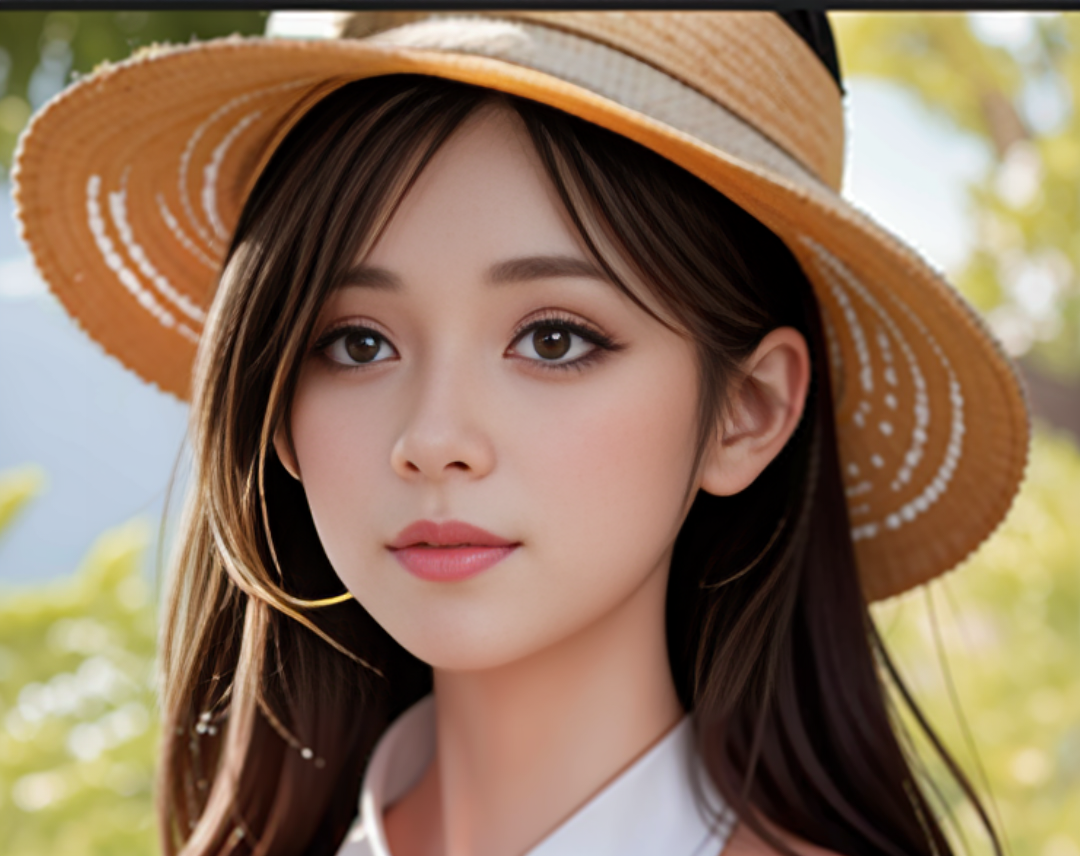
(1) 老照片放大和修复
趣味屋用上面小姐姐的脸部截图,做个栗子:
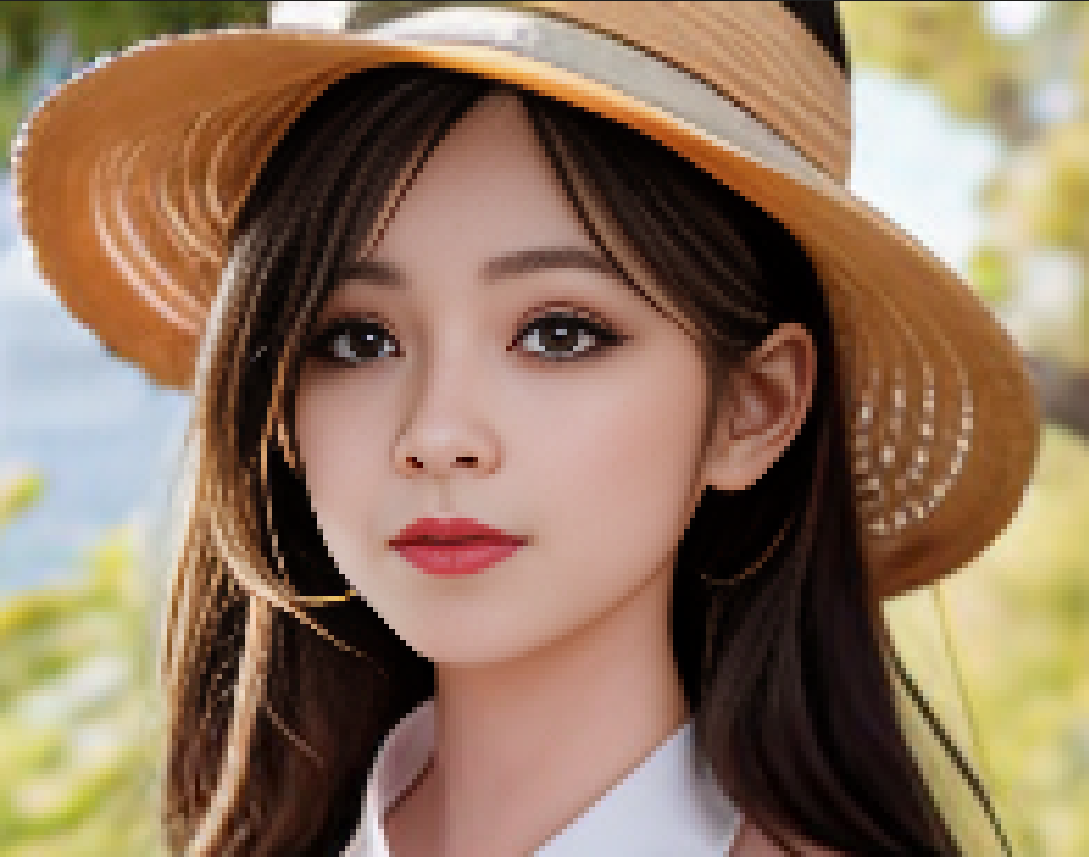
可以看到马赛克感很严重哈。
修复后(放大4倍)的效果:
漂亮!还原度很高的~
参数设置:
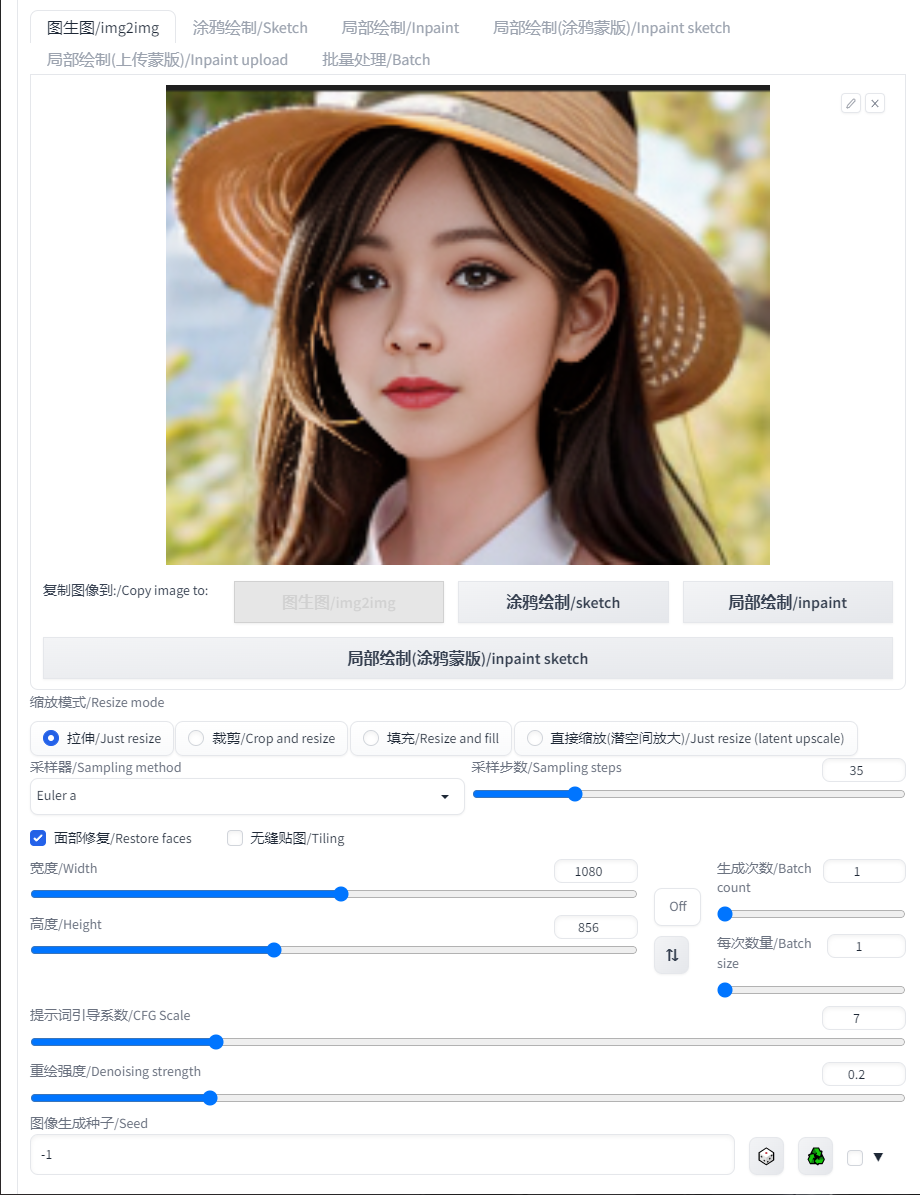
提示词:
(masterpiece:1.0), (best quality:1.0), (ultra highres:1.0) ,(8k resolution:1.0),(realistic:1.0),(ultra detailed1:0), (sharp focus1:0), (RAW photo:1.0),beautifull woman,cute, walking,walking in the park, solo,skirt,shorts, long hair, hat,
反向提示词:(easynegative:1.2), (worst quality: 1.2), (low quality: 1.2),nsfw,by <bad-artist-anime:0.6> , by <bad-artist:0.6> , by <bad-hands-5:0.6>, by < bad_prompt_version2:0.8>
Steps: 35, Sampler: Euler a, CFG scale: 7, Seed: 1553097589,
Face restoration: CodeFormer, Size: 1080x856,
Model: Guofeng3_v33,
Denoising strength: 0.2
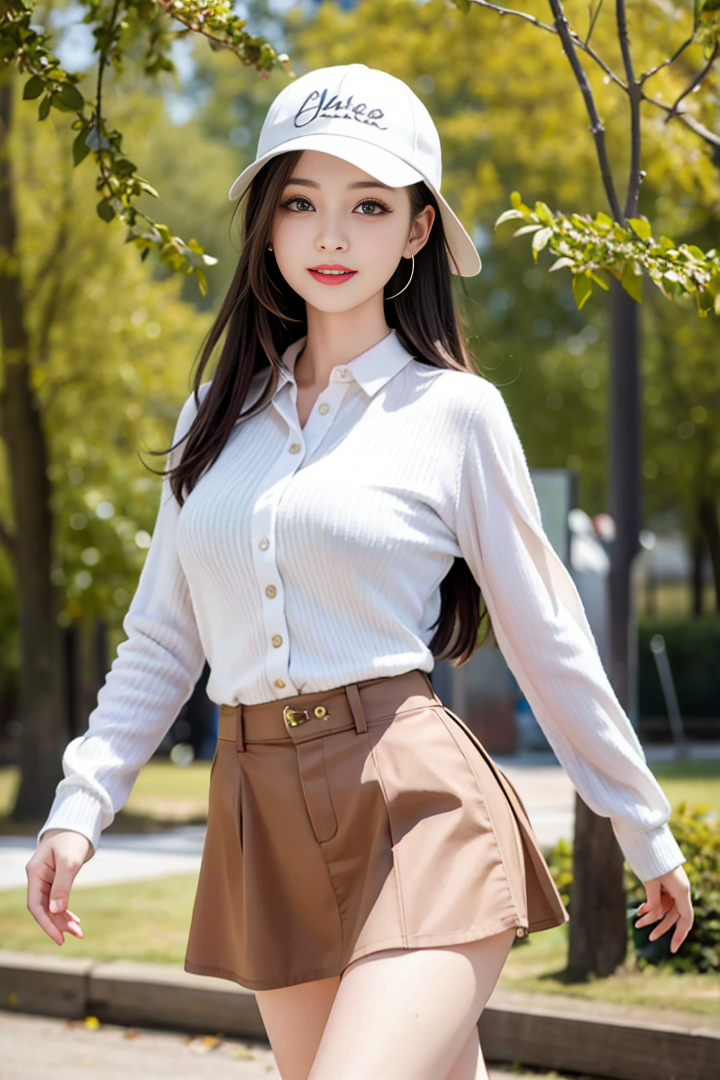
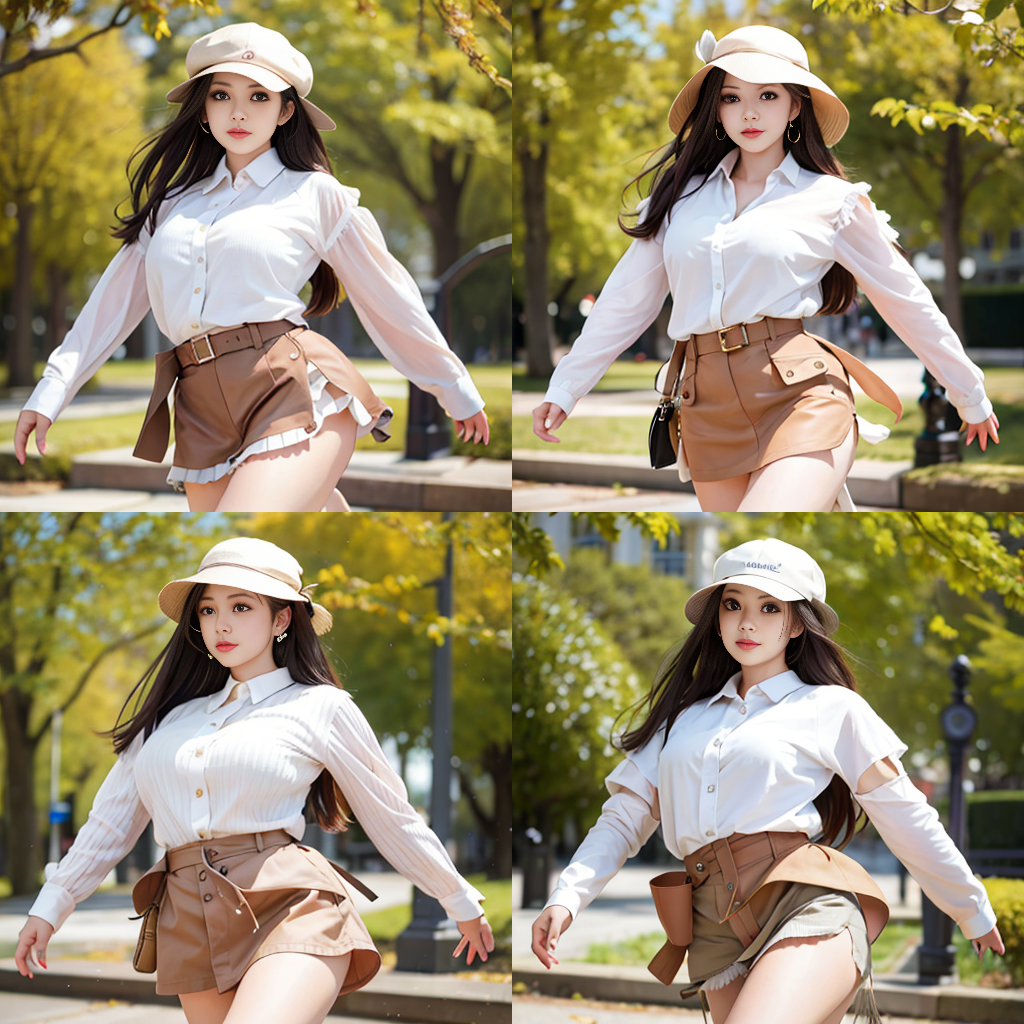
(2) 线稿生图
线稿(图片来源网络,侵删):

合成:
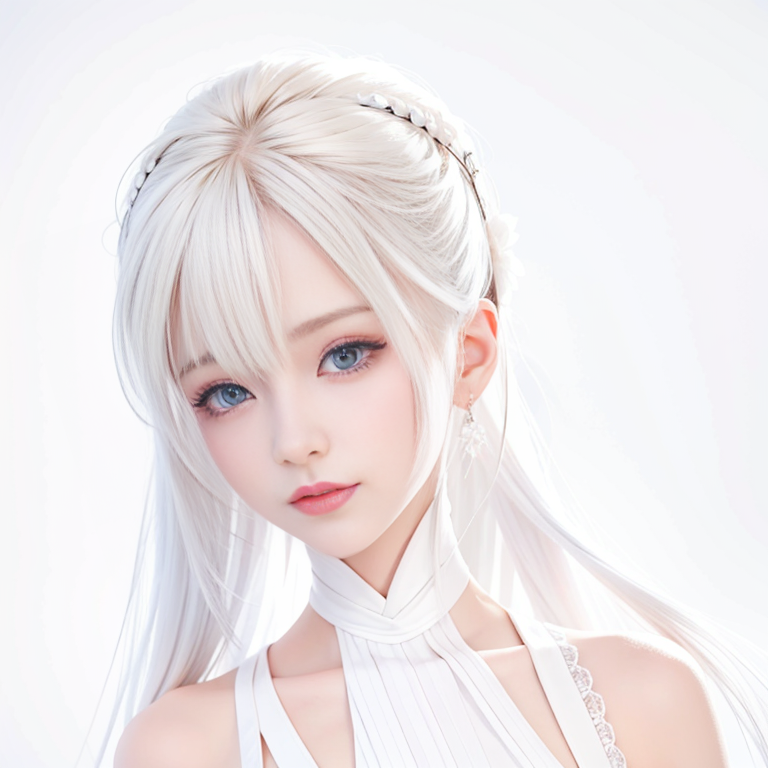
虽说不能完全一样,但意义非凡!但总有大佬不甘平庸,请大佬去试试AI绘图高阶技巧:ControlNet,地址:
https://github.com/Mikubill/sd-webui-controlnet
ControlNet我们就不扩展说了。
讲回来,图生图的线稿生图。
用法,参数设置:
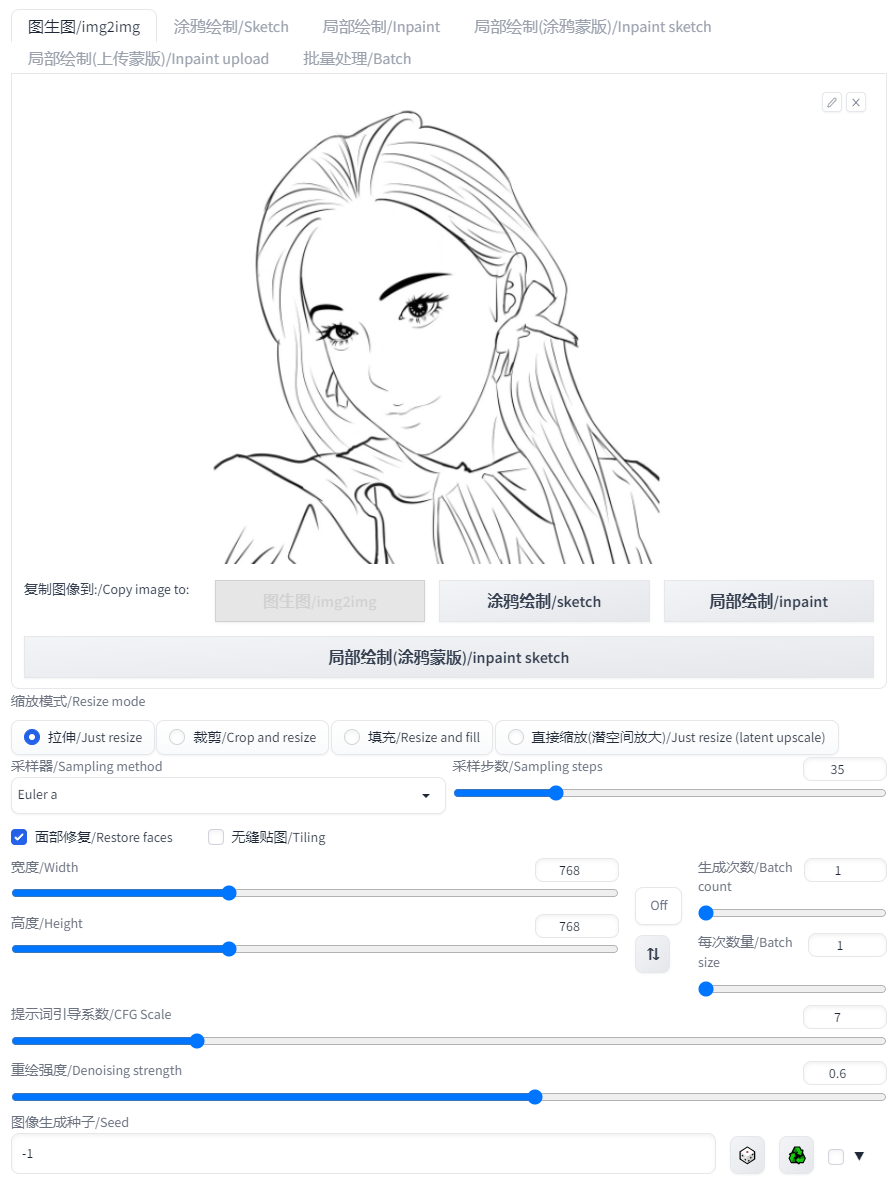
提示词:
(masterpiece:1.0), (best quality:1.0), (ultra highres:1.0) ,(8k resolution:1.0),(realistic:1.0),(ultra detailed1:0), (sharp focus1:0), (RAW photo:1.0),simple background,beautifull woman,cute,solo focus, long hair,
反向提示词:(easynegative:1.2), (worst quality: 1.2), (low quality: 1.2),nsfw,by <bad-artist-anime:0.6> , by <bad-artist:0.6> , by <bad-hands-5:0.6>, by < bad_prompt_version2:0.8>
Steps: 35, Sampler: Euler a, CFG scale: 7, Seed: 2577545838,
Face restoration: CodeFormer, Size: 768x768,
Model: Guofeng3_v33,
Denoising strength: 0.6
在图生图这就先举两个栗子吧!更多惊喜请大家接着往下看~
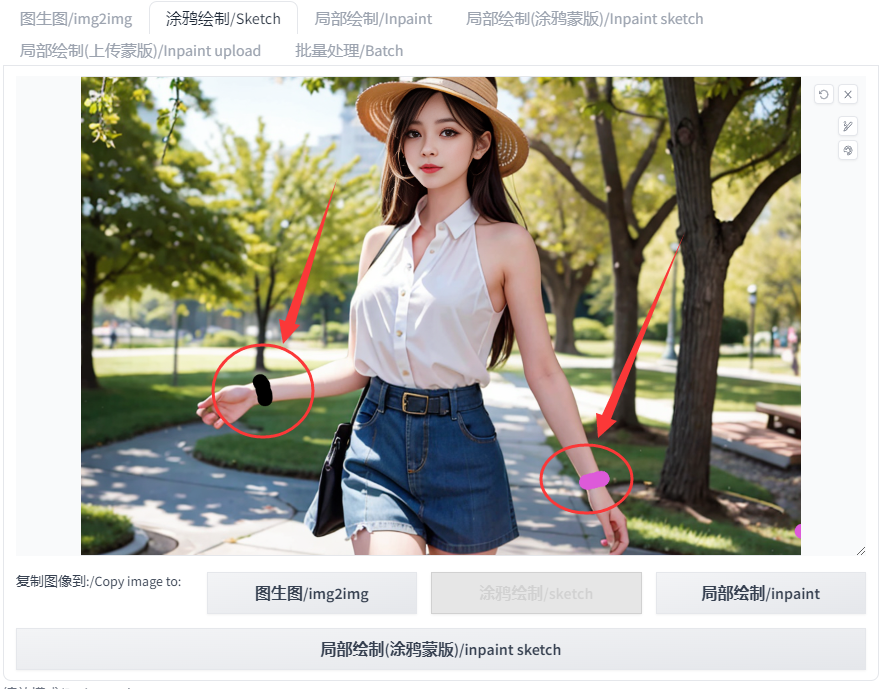
涂鸦绘制(Sketch)
涂鸦绘制(Sketch),让AI通过识别我们手绘的草图,再根据提示词信息将草图转换为高质量的图像。通俗点讲,就是我们在原图的基础上以涂鸦的方式添加额外信息。
来个栗子:
趣闻屋要给小姐姐加上手表和紫色的首饰,用 Sketch 的绘制板在小姐姐的手腕处绘制了两个蒙版:
参数设置:
提示词:
(masterpiece:1.0), (best quality:1.0), (ultra highres:1.0) ,(8k resolution:1.0),(realistic:1.0),(ultra detailed1:0), (sharp focus1:0), (RAW photo:1.0),watch, wristwatch,purple Bracelet
反向提示词:(easynegative:1.2), (worst quality: 1.2), (low quality: 1.2),nsfw,by <bad-artist-anime:0.6> , by <bad-artist:0.6> , by <bad-hands-5:0.6>, by < bad_prompt_version2:0.8>
Steps: 35, Sampler: Euler a, CFG scale: 7, Seed: 3292315185,Face restoration: CodeFormer, Size: 1080x736,
Model: Guofeng3_v33,
Denoising strength: 0.5
得到效果:
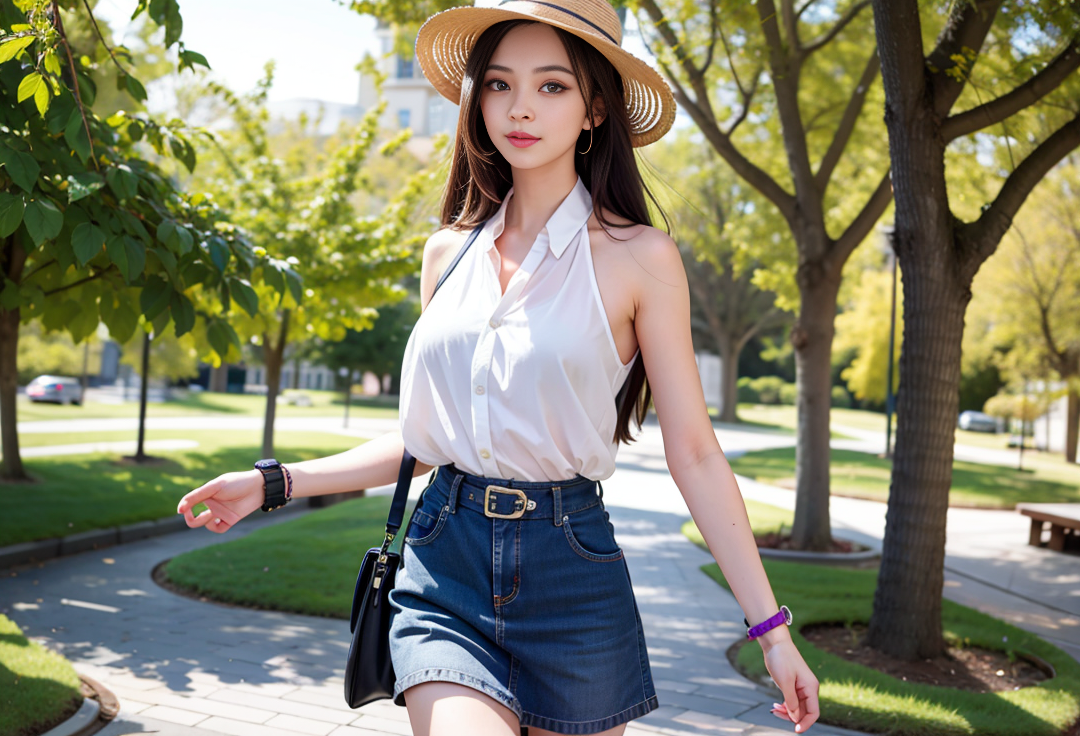
虽说手指有点崩坏,但是确实得到了想要的物品。手指崩坏的原因是涂鸦绘制(Sketch)是全图绘制,会根据重绘强度修改全图内容。后面使用局部涂鸦绘制(inpaint sketch)就能实现只在蒙版区域绘制啦。稳一点~
总结:涂鸦绘制(Sketch)不仅可以增加首饰,还可以修改物品,把普通杯子换成咖啡杯,修改天空颜色,修改花草颜色,可以把一块区域换成水潭等等。
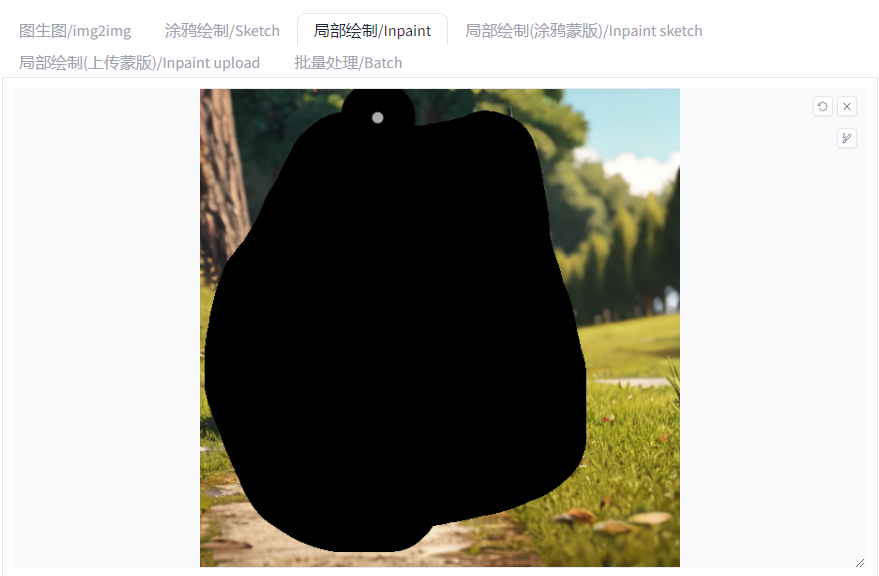
局部绘制(Inpaint)
局部绘制(Inpaint),是在图生图里最常用的操作之一,趣闻屋使用频率它排第二,仅此与图生图。
它的功能是在原图的上添加一个蒙版,使AI对蒙版区域或非蒙版区域进行重绘的操作。

局部绘制(Inpaint)比之 图生图(img2img)多了几个参数,我们先来了解下。
1.蒙版模糊度(Mask blur)

蒙版模糊度(Mask blur) ,以像素为单位,在处理前要对蒙版进行多强的模糊。
不是特理解,那我们就先来看看它在不同数值下会发生什么改变:
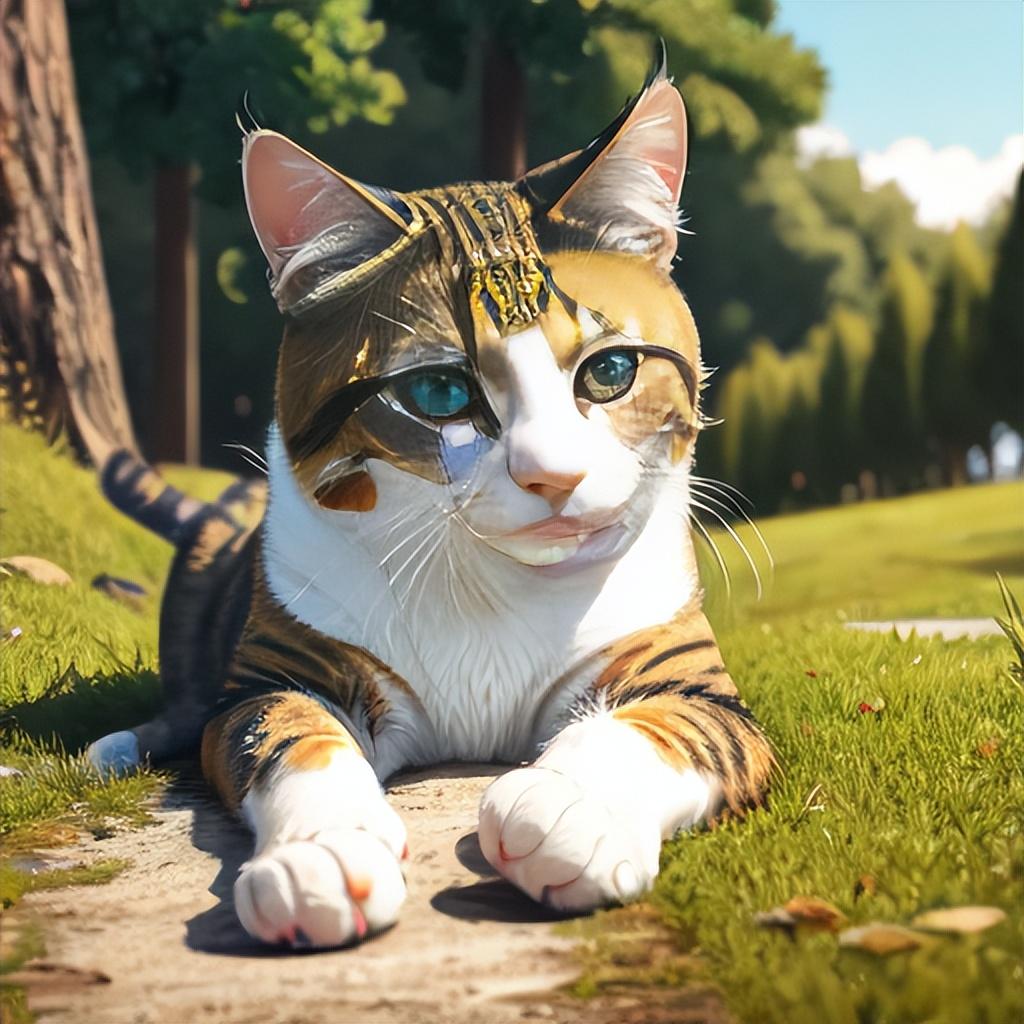
原图:
蒙版图:
提示词:
(masterpiece:1.0), (best quality:1.0), (ultra highres:1.0) ,(8k resolution:1.0),(realistic:1.0),(ultra detailed1:0), (sharp focus1:0), (RAW photo:1.0),outdoors,cat,solo, no humans,
反提示词:(easynegative:1.2), (worst quality: 1.2), (low quality: 1.2),humans,by <bad-artist-anime:0.6> , by <bad-artist:0.6> , by <bad-hands-5:0.6>, by < bad_prompt_version2:0.8>
Steps: 25, Sampler: DPM++ SDE Karras, CFG scale: 7, Seed: 3127452694,Face restoration: CodeFormer, Size: 512x512,
Model: revAnimated_v11-inpainting,
Denoising strength: 0,
Conditional mask weight: 1.0, Mask blur: 4
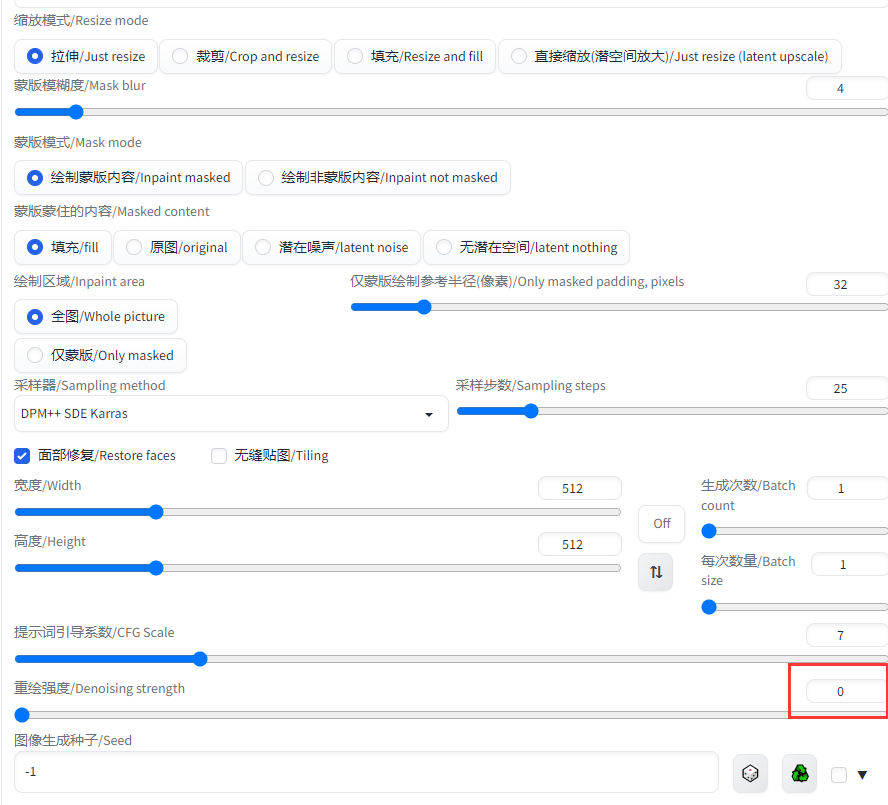
重绘强度为0的情况下,得到:
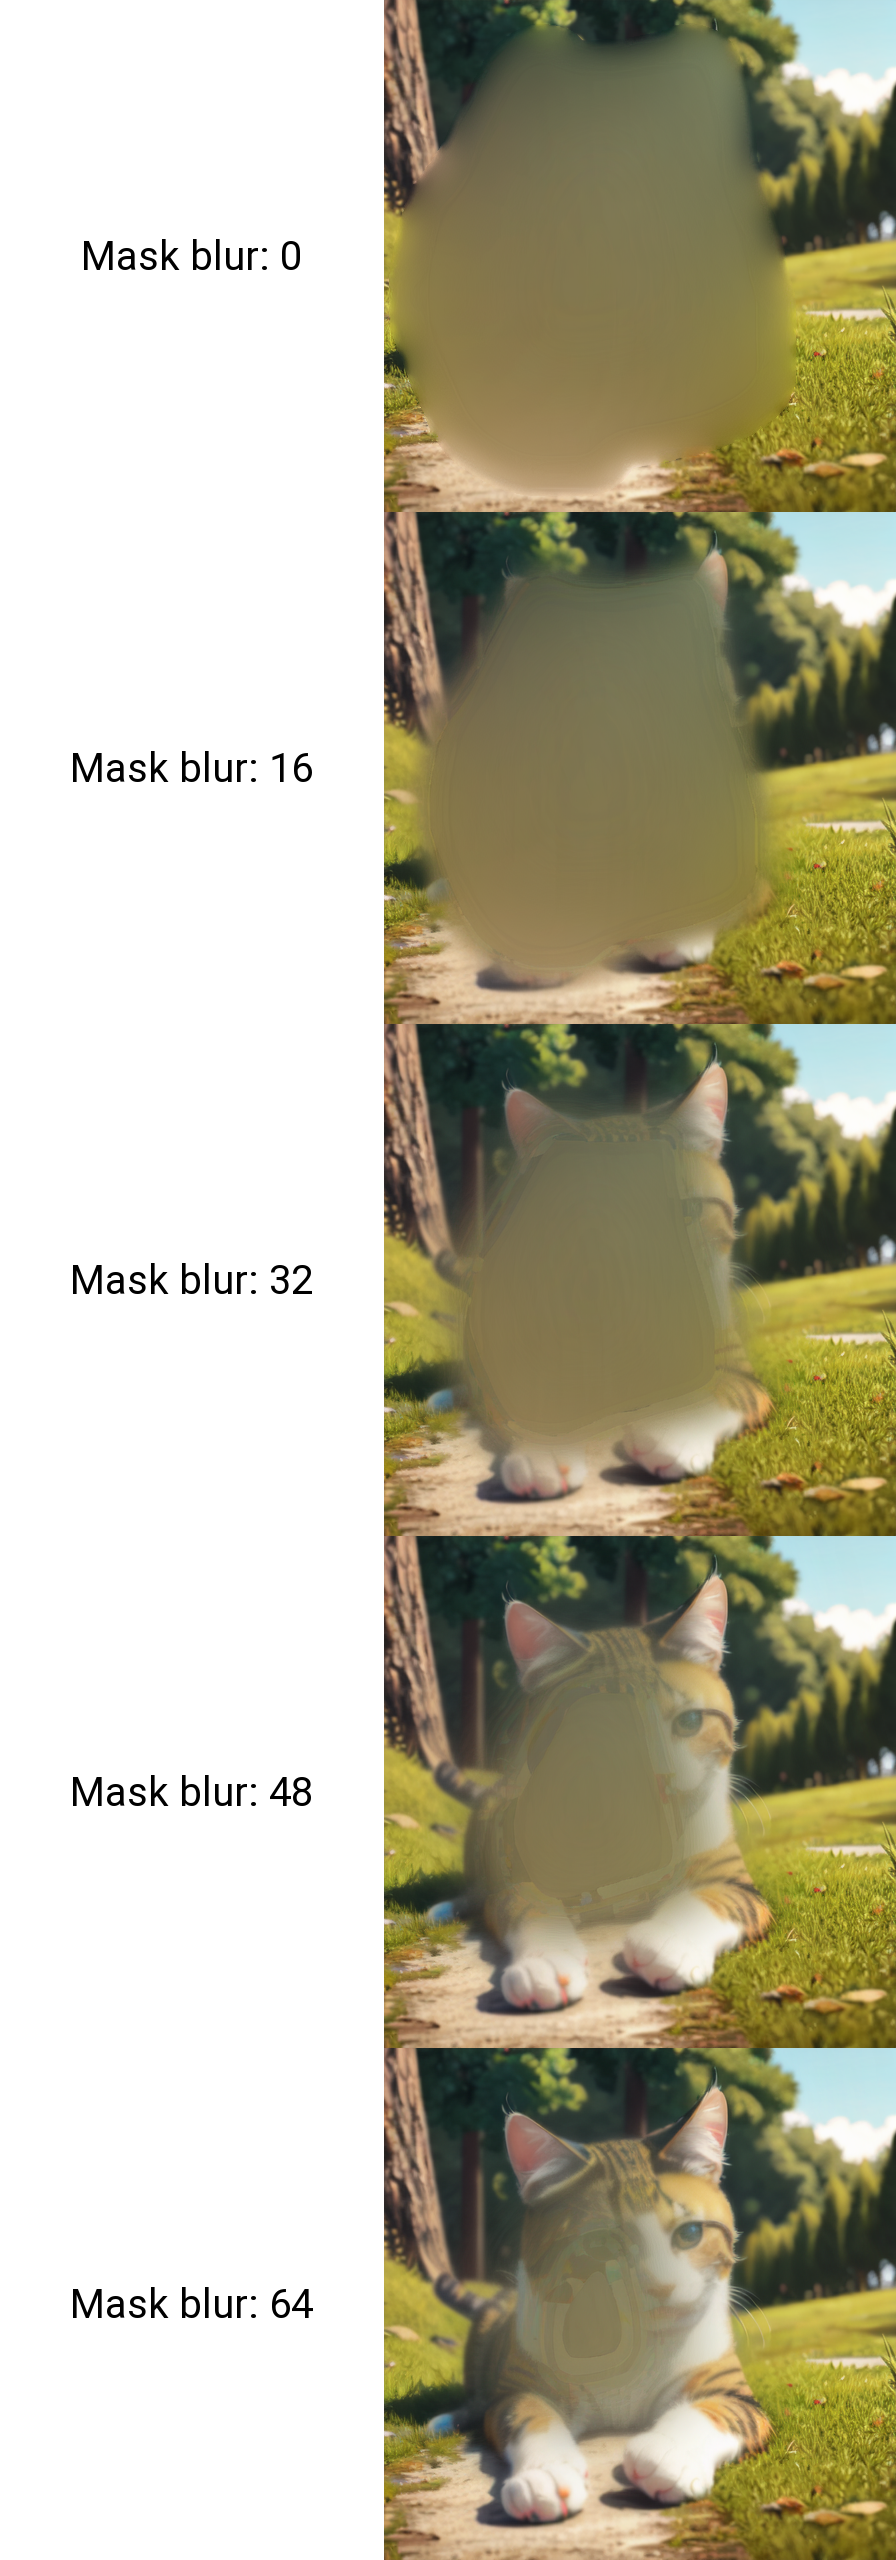
结合解释理解,大概意思就是从蒙版的边缘到中心的透明度渐变,类似蒙版羽化的效果。
再来看看,有重绘值的情况下,其他数值不变,重绘值0.6:
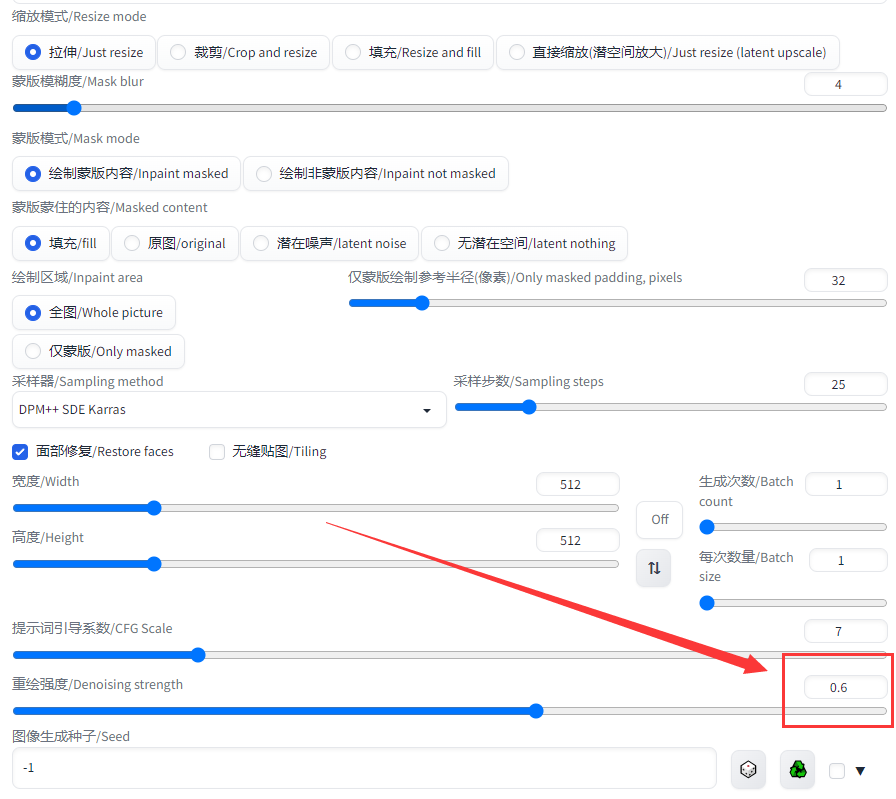
得到:

对比原图:
结论:遮罩的模糊度越高,对结果的影响越小。
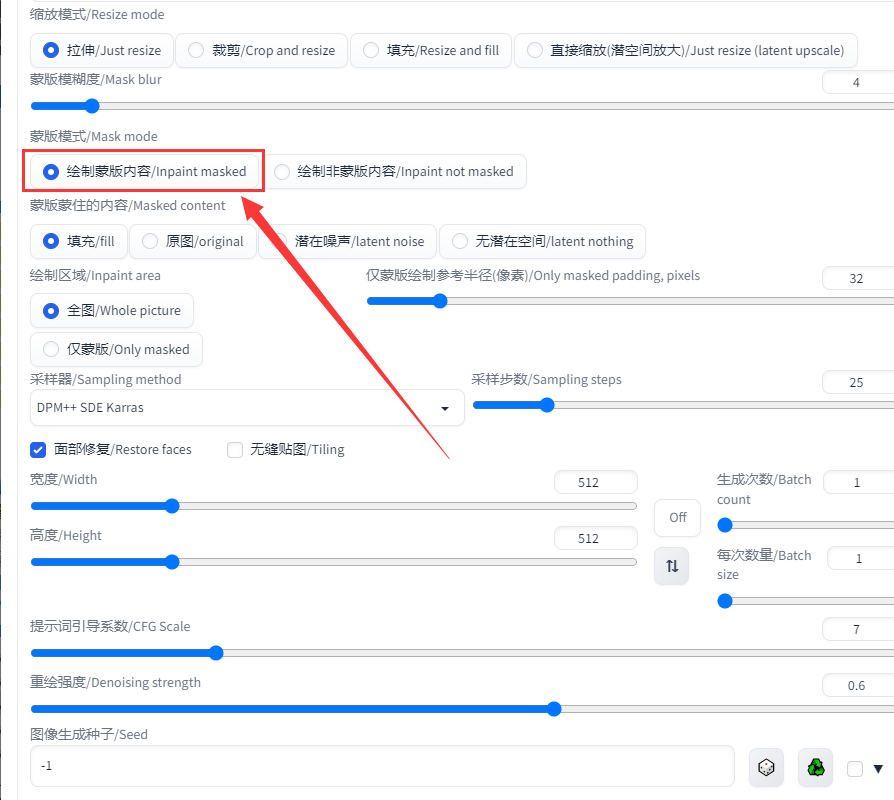
2.蒙版模式(Mask mode)

蒙版模式(Mask mode)可选绘制蒙版遮罩的内容,还是非蒙版遮罩的内容。
常修改的参数之一,可以根据提示词和重绘值的大小,调整内容相似度。
举几个栗子:
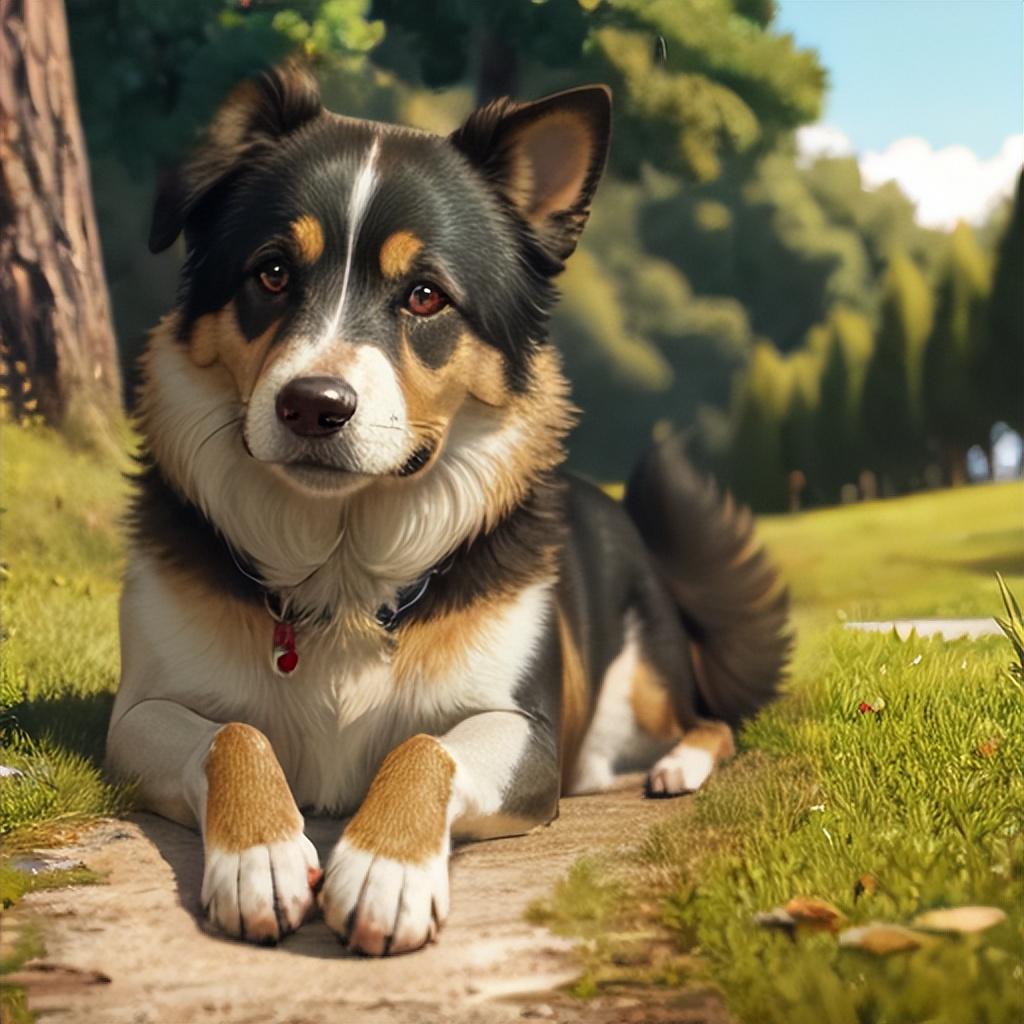
栗子(1): 我们把上面的猫猫换成狗狗:
遮罩图:

参数设置:
提示词:
(masterpiece:1.0), (best quality:1.0), (ultra highres:1.0) ,(8k resolution:1.0),(realistic:1.0),(ultra detailed1:0), (sharp focus1:0), (RAW photo:1.0),outdoors,
dog,solo, no humans,
反提示词:(easynegative:1.2), (worst quality: 1.2), (low quality: 1.2),humans,by <bad-artist-anime:0.6> , by <bad-artist:0.6> , by <bad-hands-5:0.6>, by < bad_prompt_version2:0.8>
Steps: 25, Sampler: DPM++ SDE Karras, CFG scale: 7, Seed: 1214143565,Face restoration: CodeFormer, Size: 512x512,
Model: revAnimated_v11-inpainting,
Denoising strength: 0.6,
Conditional mask weight: 1.0, Mask blur: 4
选【绘制蒙版绘制】:
得到:
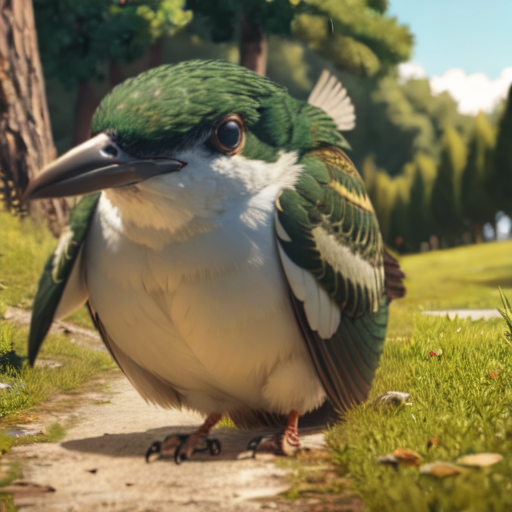
栗子(2) :换成鸟,只需要把提示词里面的dog改成bird,其他不动:

得到:
栗子(3): 我们把猫猫的照片背景换一下:
选【绘制非蒙版内容】
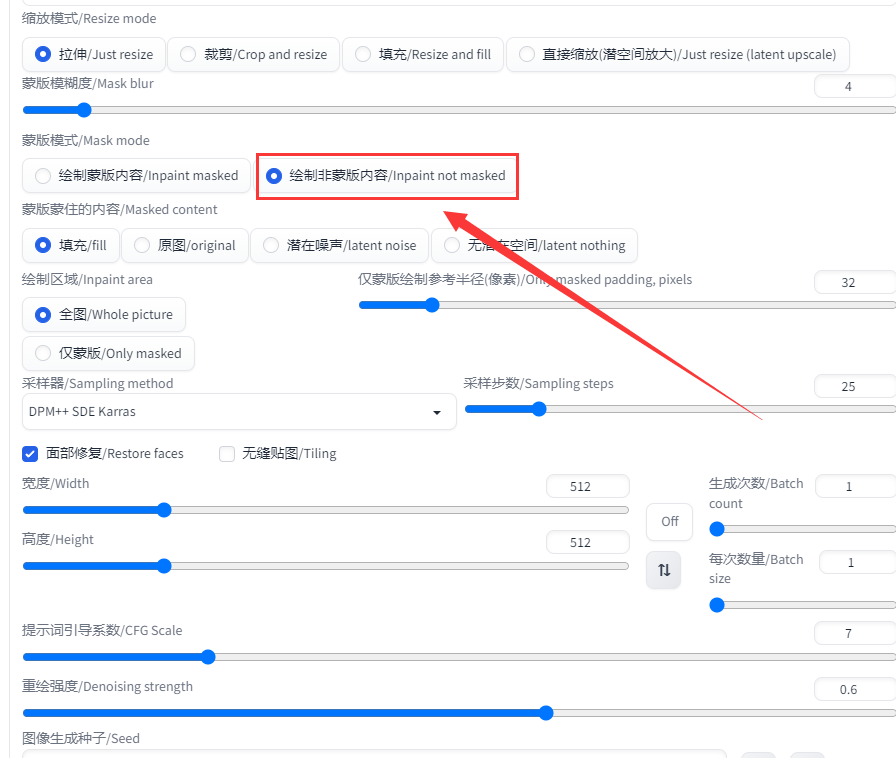
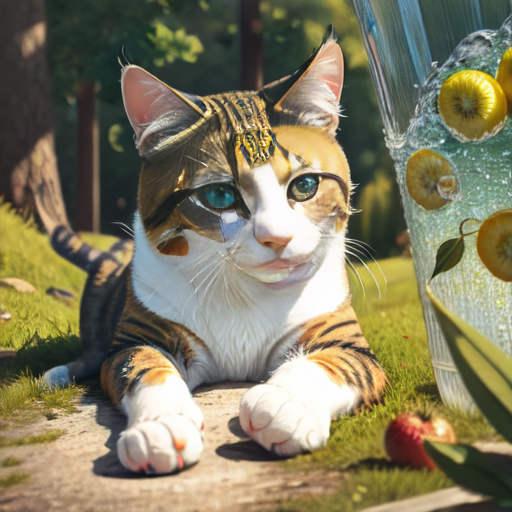
我们把提示词修改下,原本的cat,solo, no humans,去掉,换成water 和 fruit:

其他参数不变,选择【绘制非蒙版内容】:
趣闻屋举几个简单的例子,只是想说明下参数的原理和作用,更多高级玩法。请同学们自行研究。皇帝新衣什么的,都只是小道,为小道尔!
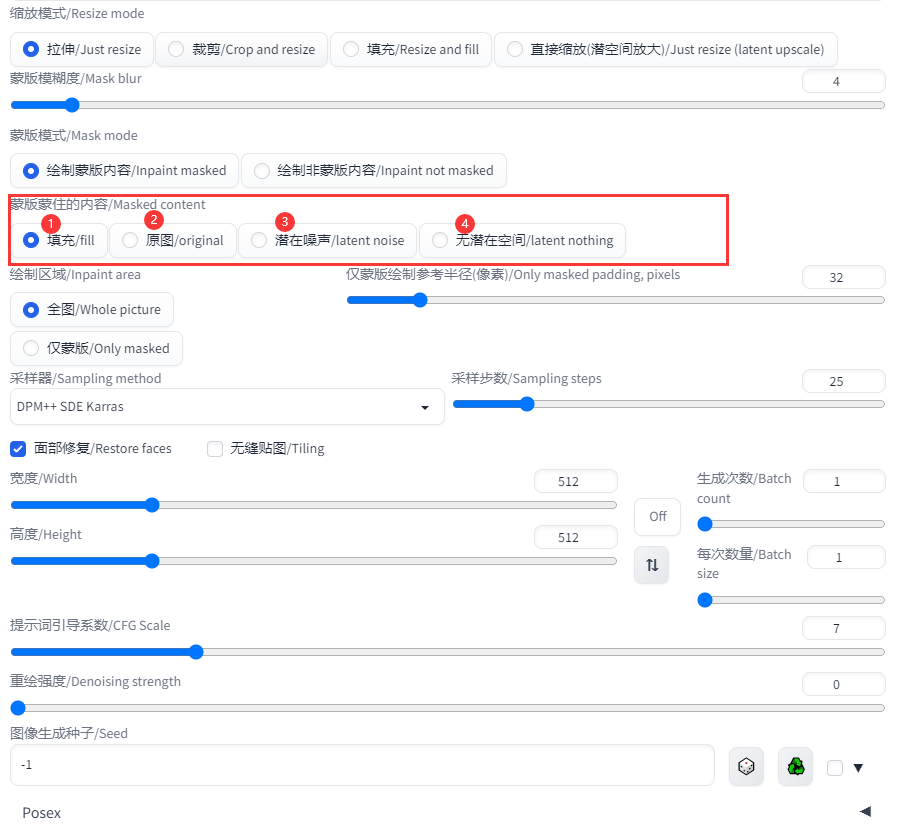
3.蒙版蒙住的内容(Masked content)

蒙版蒙住的内容(Masked content),提示解释:在使用SD处理蒙版区域之前,要在蒙版区域内放置什么。有点蒙。再来看看官网的描述:

简单翻译下:Masked content 字段决定着在绘制(inpaint)之前放置到蒙版区域的内容。这并不代表的最终的出图效果。只是看看在绘制过程(mid-process)阶段有什么东西。
额,还是有点蒙。没关系,看不懂就看对比和影响。
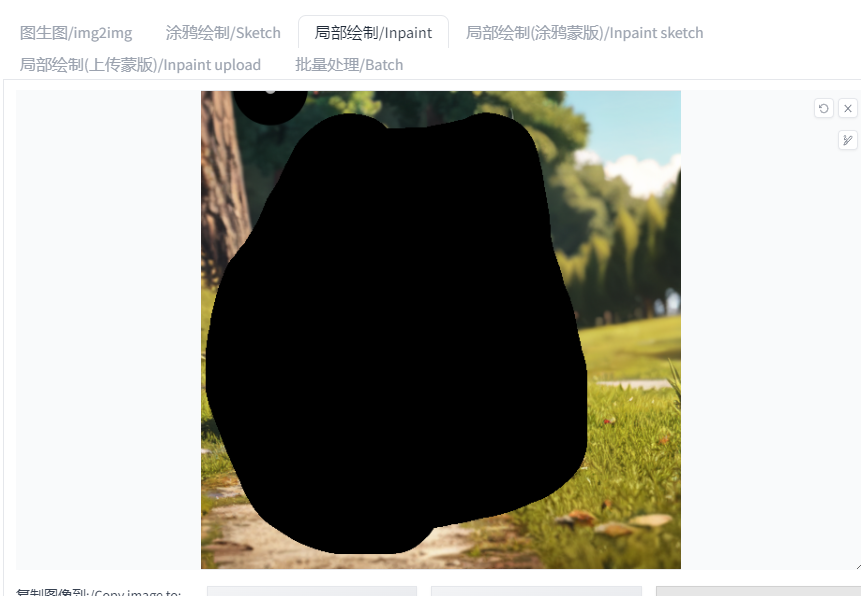
还是我们的猫猫图:

蒙版图:
参数设置:
(masterpiece:1.0), (best quality:1.0), (ultra highres:1.0) ,(8k resolution:1.0),(realistic:1.0),(ultra detailed1:0), (sharp focus1:0), (RAW photo:1.0),outdoors,
cat,solo, no humans,
Negative prompt:(easynegative:1.2), (worst quality: 1.2), (low quality: 1.2),humans,by <bad-artist-anime:0.6> , by <bad-artist:0.6> , by <bad-hands-5:0.6>, by < bad_prompt_version2:0.8>
Steps: 25, Sampler: DPM++ SDE Karras, CFG scale: 7, Seed: 781619384,Face restoration: CodeFormer, Size: 512x512,
Model: revAnimated_v11-inpainting,
Denoising strength: 0,
Conditional mask weight: 1.0, Mask blur: 4
重绘强度为0的情况下,也就是SD绘制内容的最初始状态:
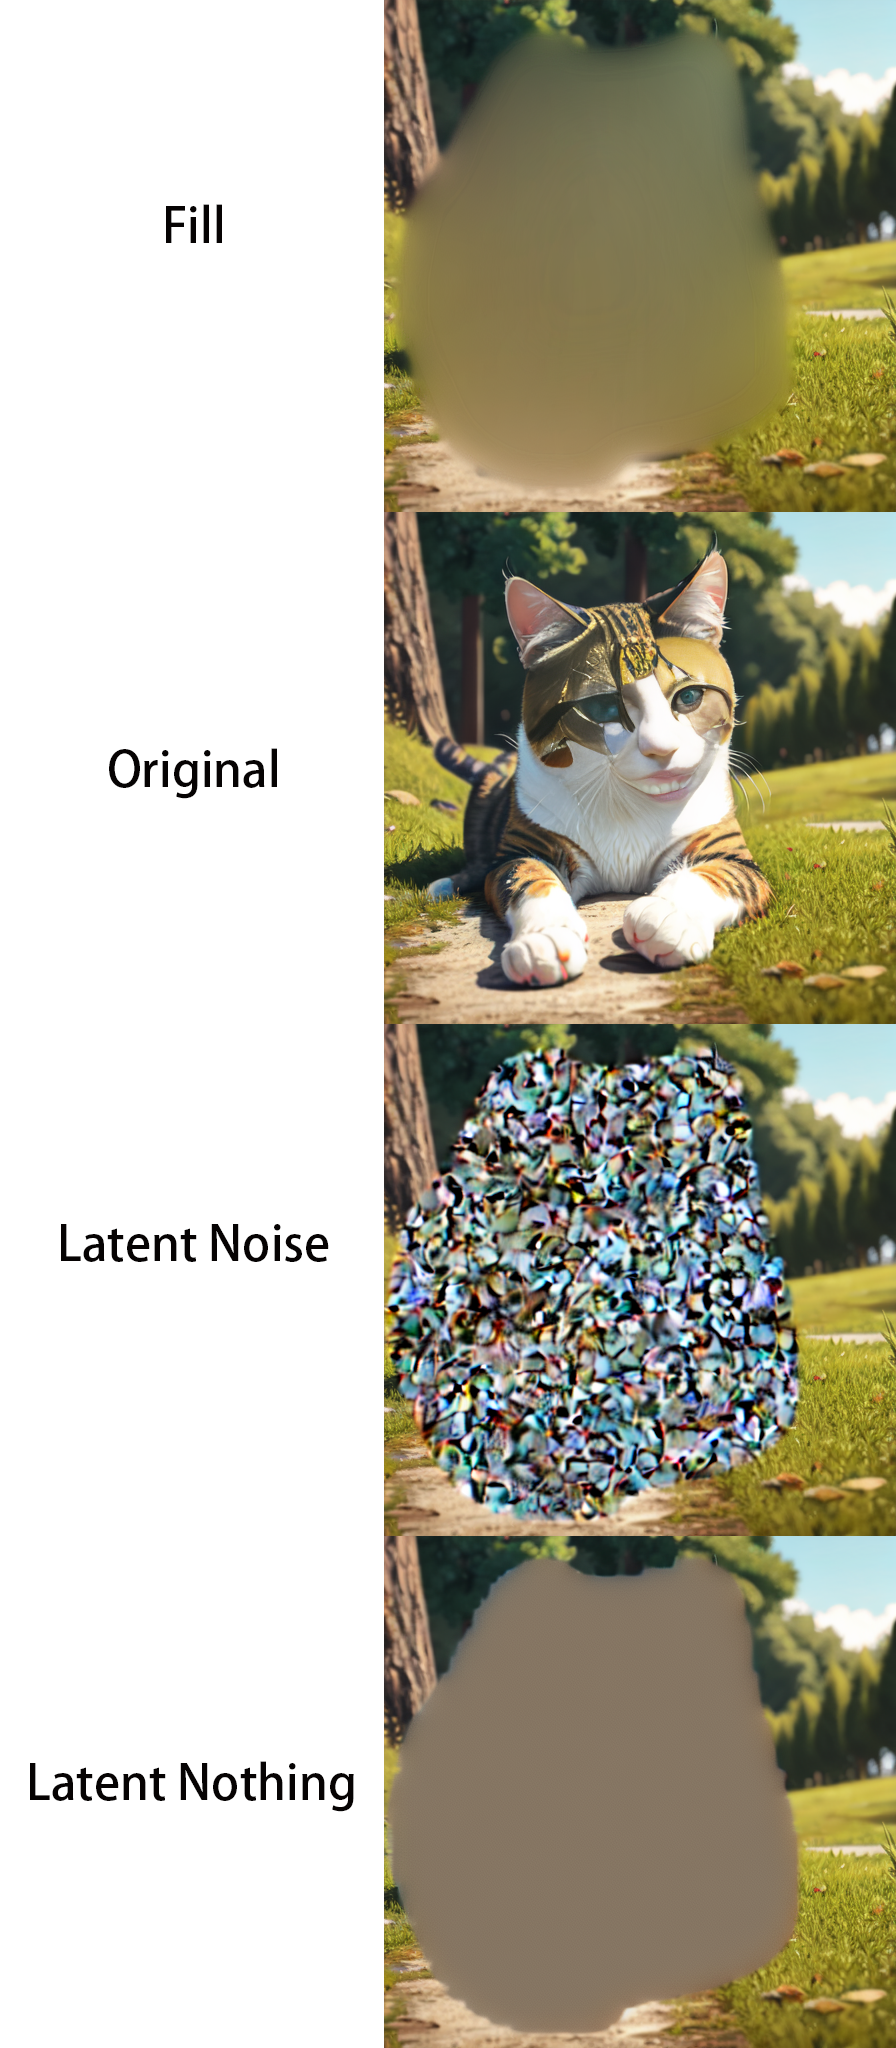
好吧,不太懂是啥。那就看对绘图的影响吧。把重绘强度设置成0.6
Denoising strength: 0.6,
效果:
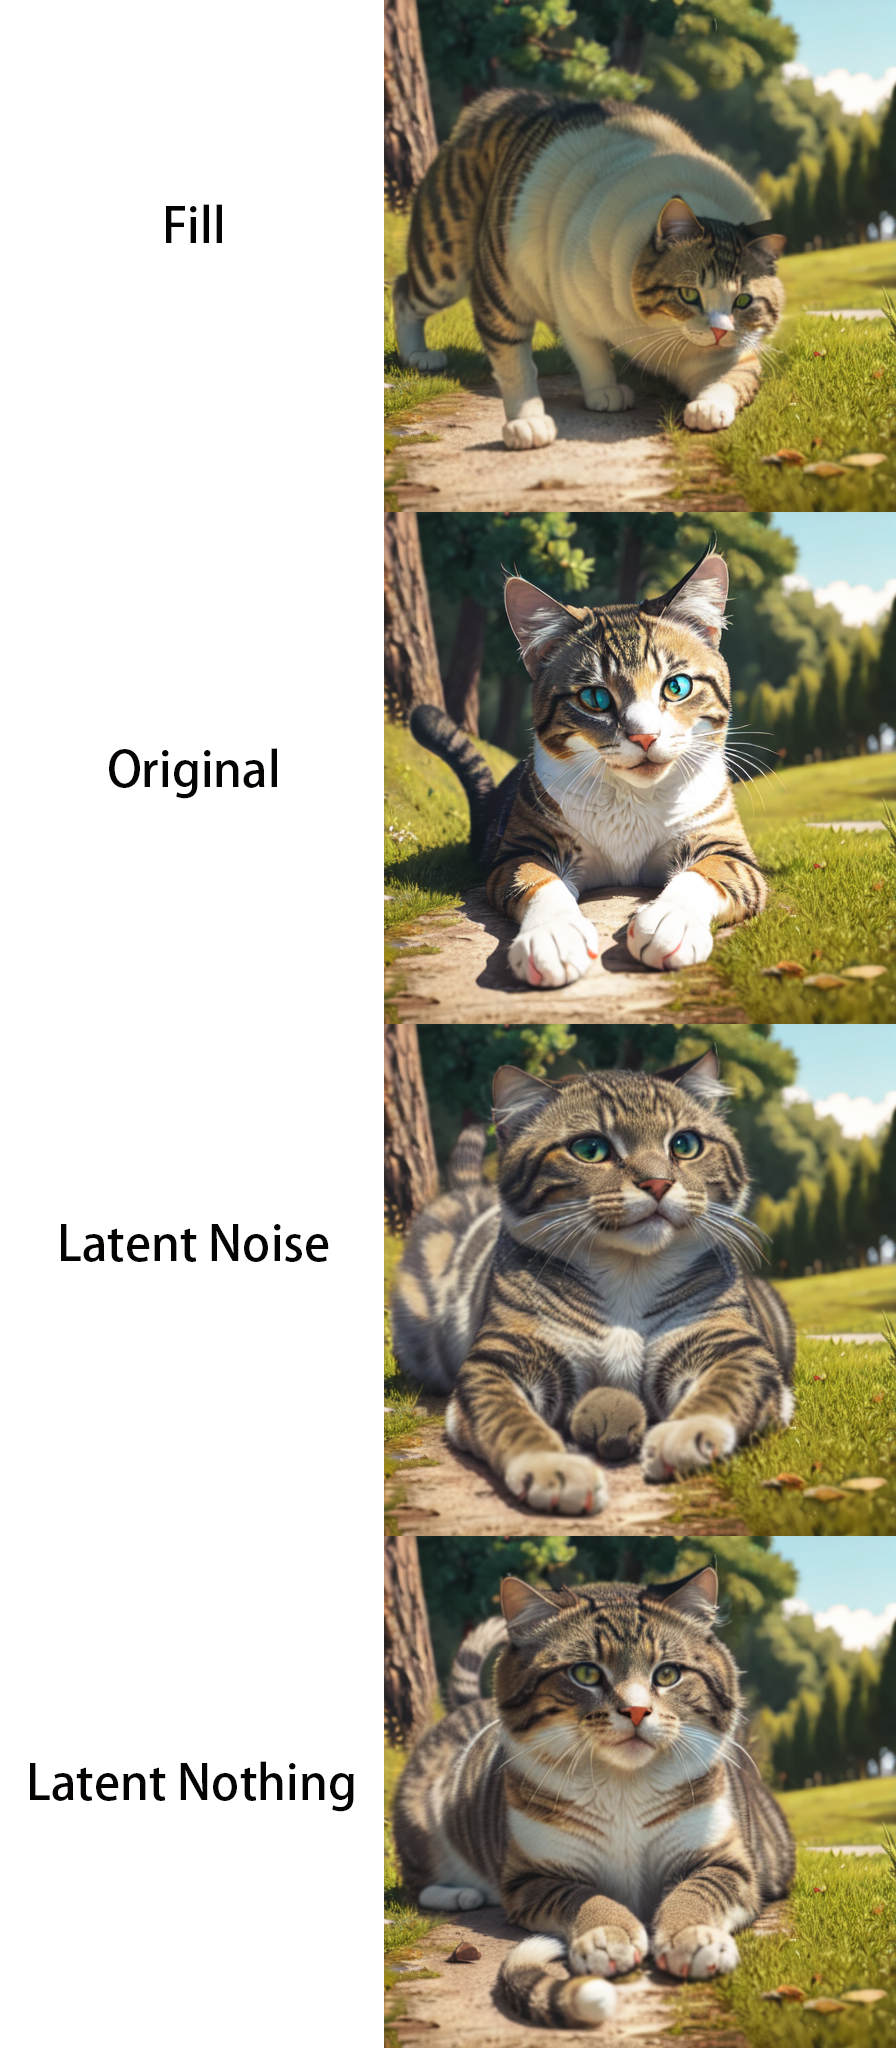
好像有点点想象了,似乎跟原图背景有关。再来一批,重绘强度有递进的对比:
Denoising strength: 0.3,0.6,0.8,1.0
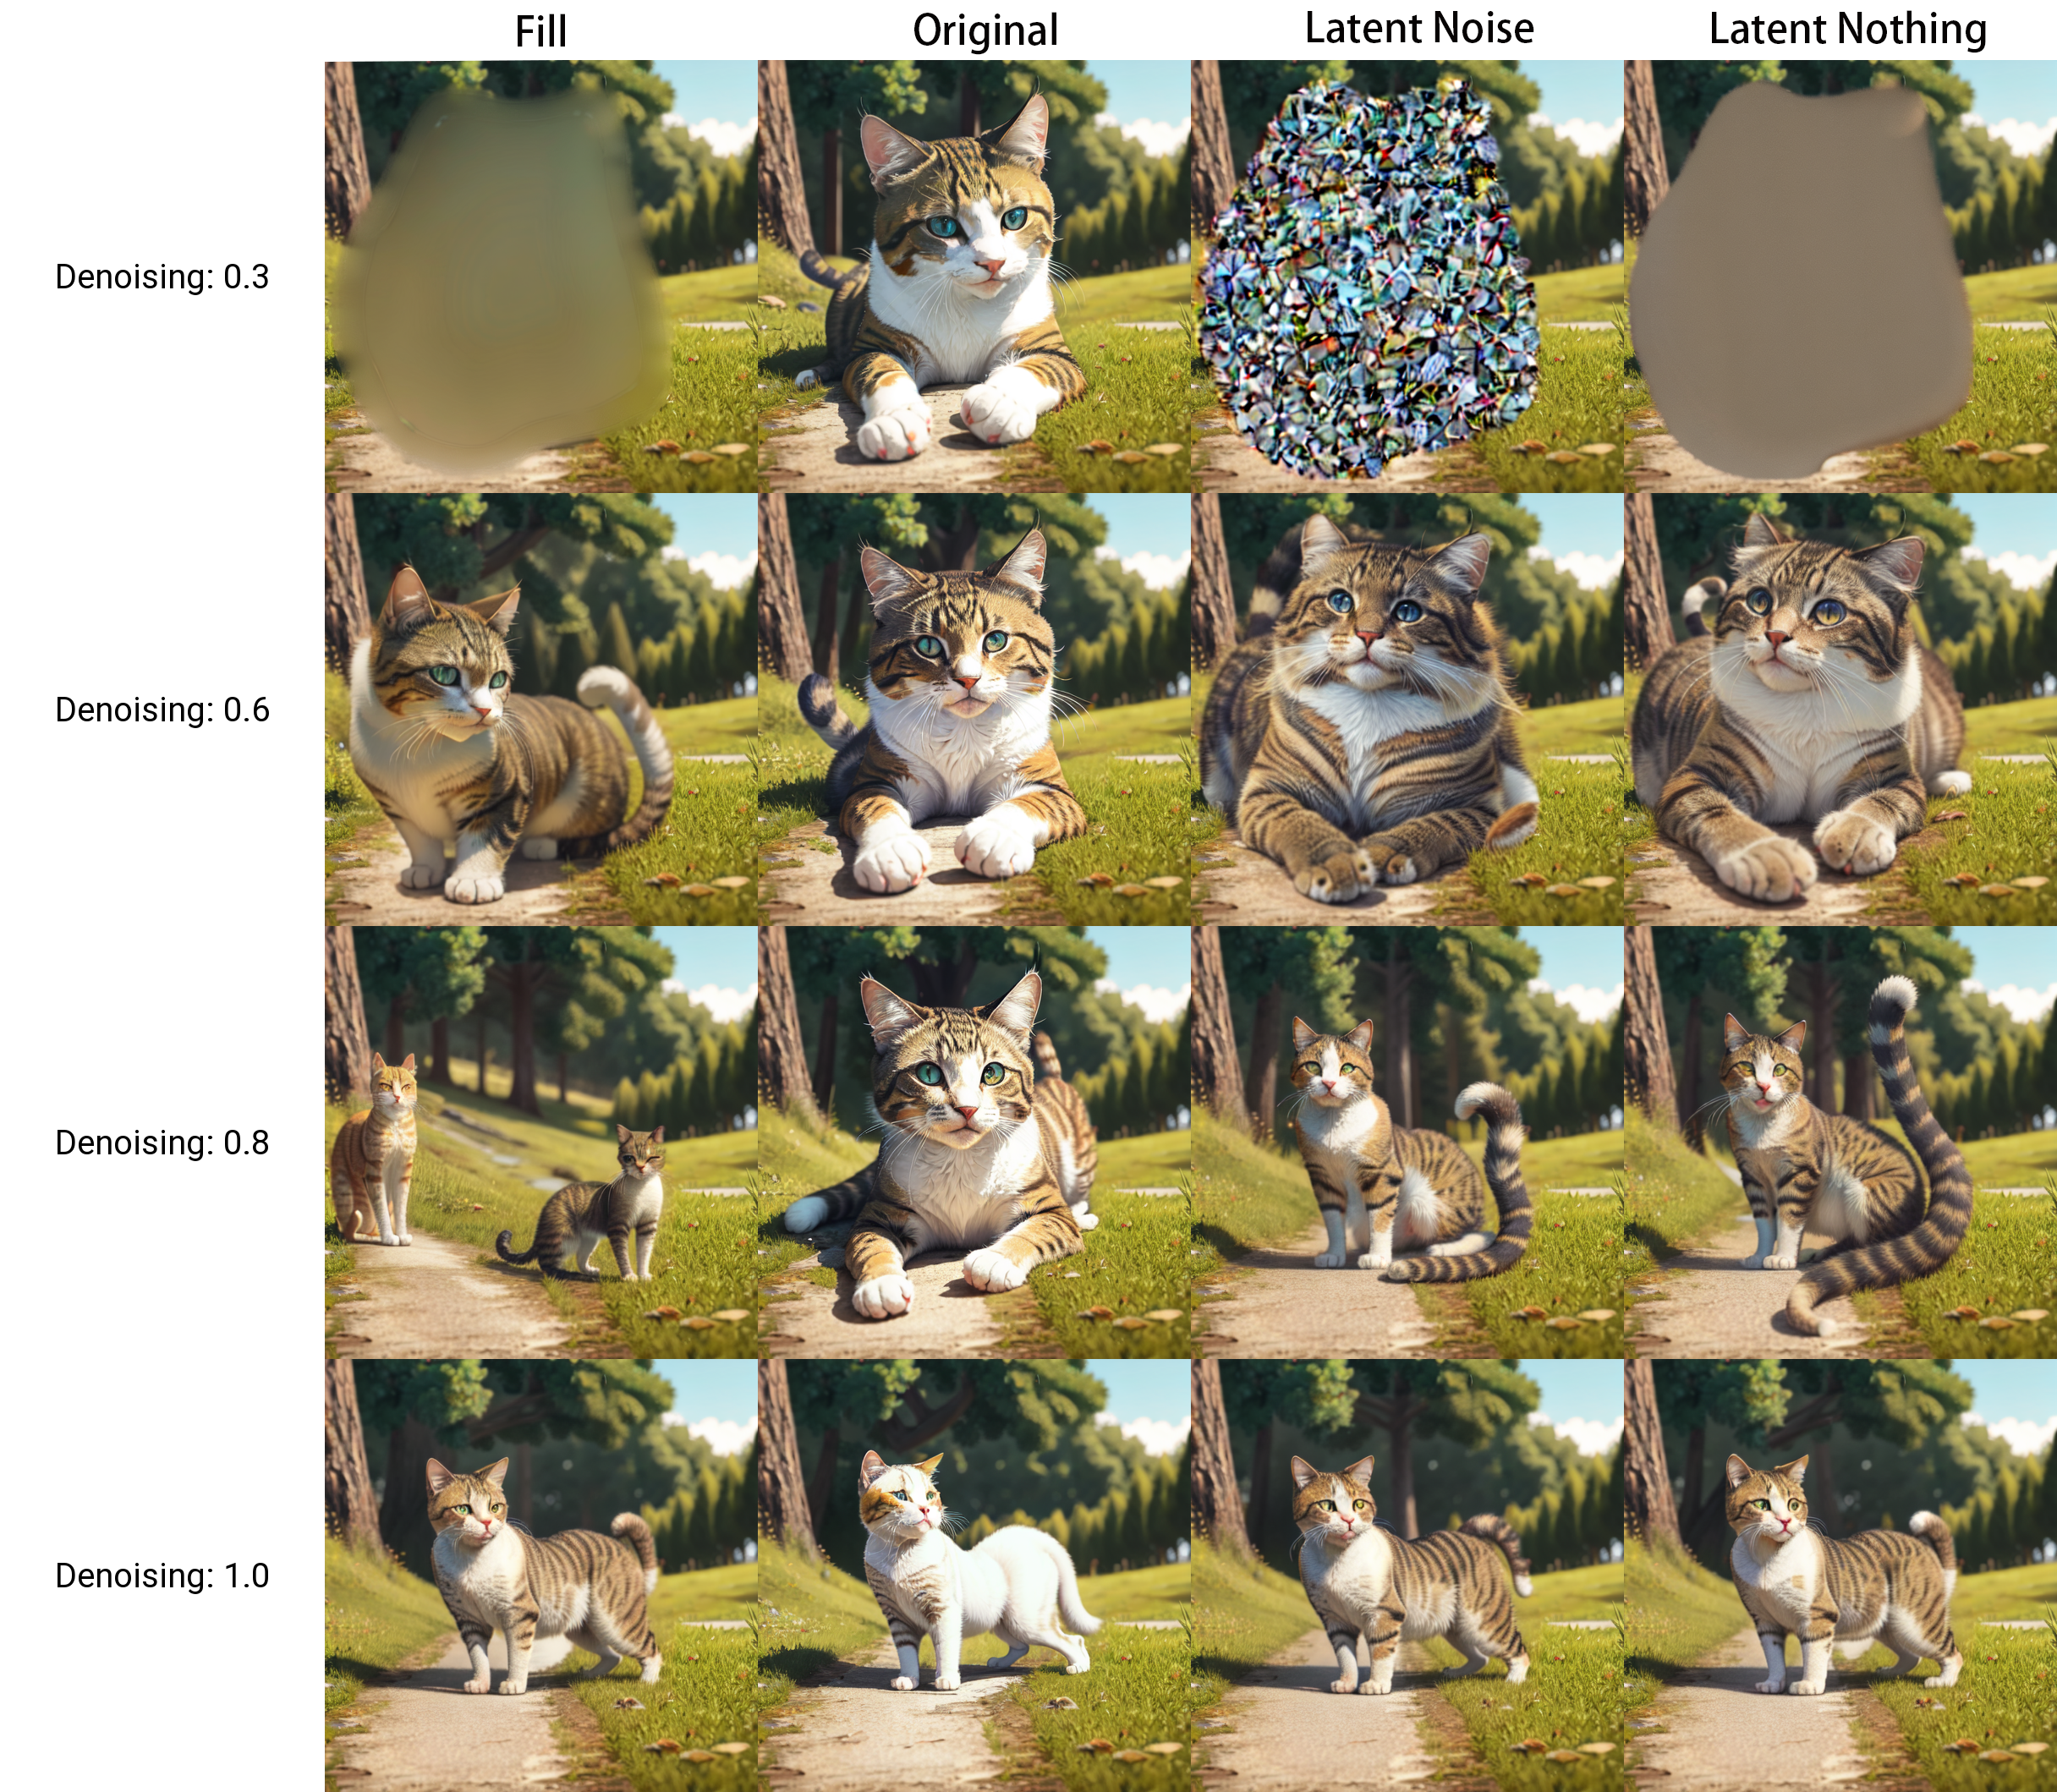
结论:结合提示词和官网的描述,趣闻屋大概这么理解:在绘制之前,往原图里添加内容
填充(fill):填充色块
原图(original):原图内容
潜在噪声(latent noise):在潜在空间添加噪声,噪点
无潜在空间(latent nothing):填充空白内容,虚无
SD会根据绘制的内容再进行降噪扩散处理,也就是SD原本的绘图过程。所以,在填充原图时,绘制的效果跟用图生图(img2img)绘制的效果,差别不大。
再来看看,使用【仅蒙版(Only masked)】

效果:
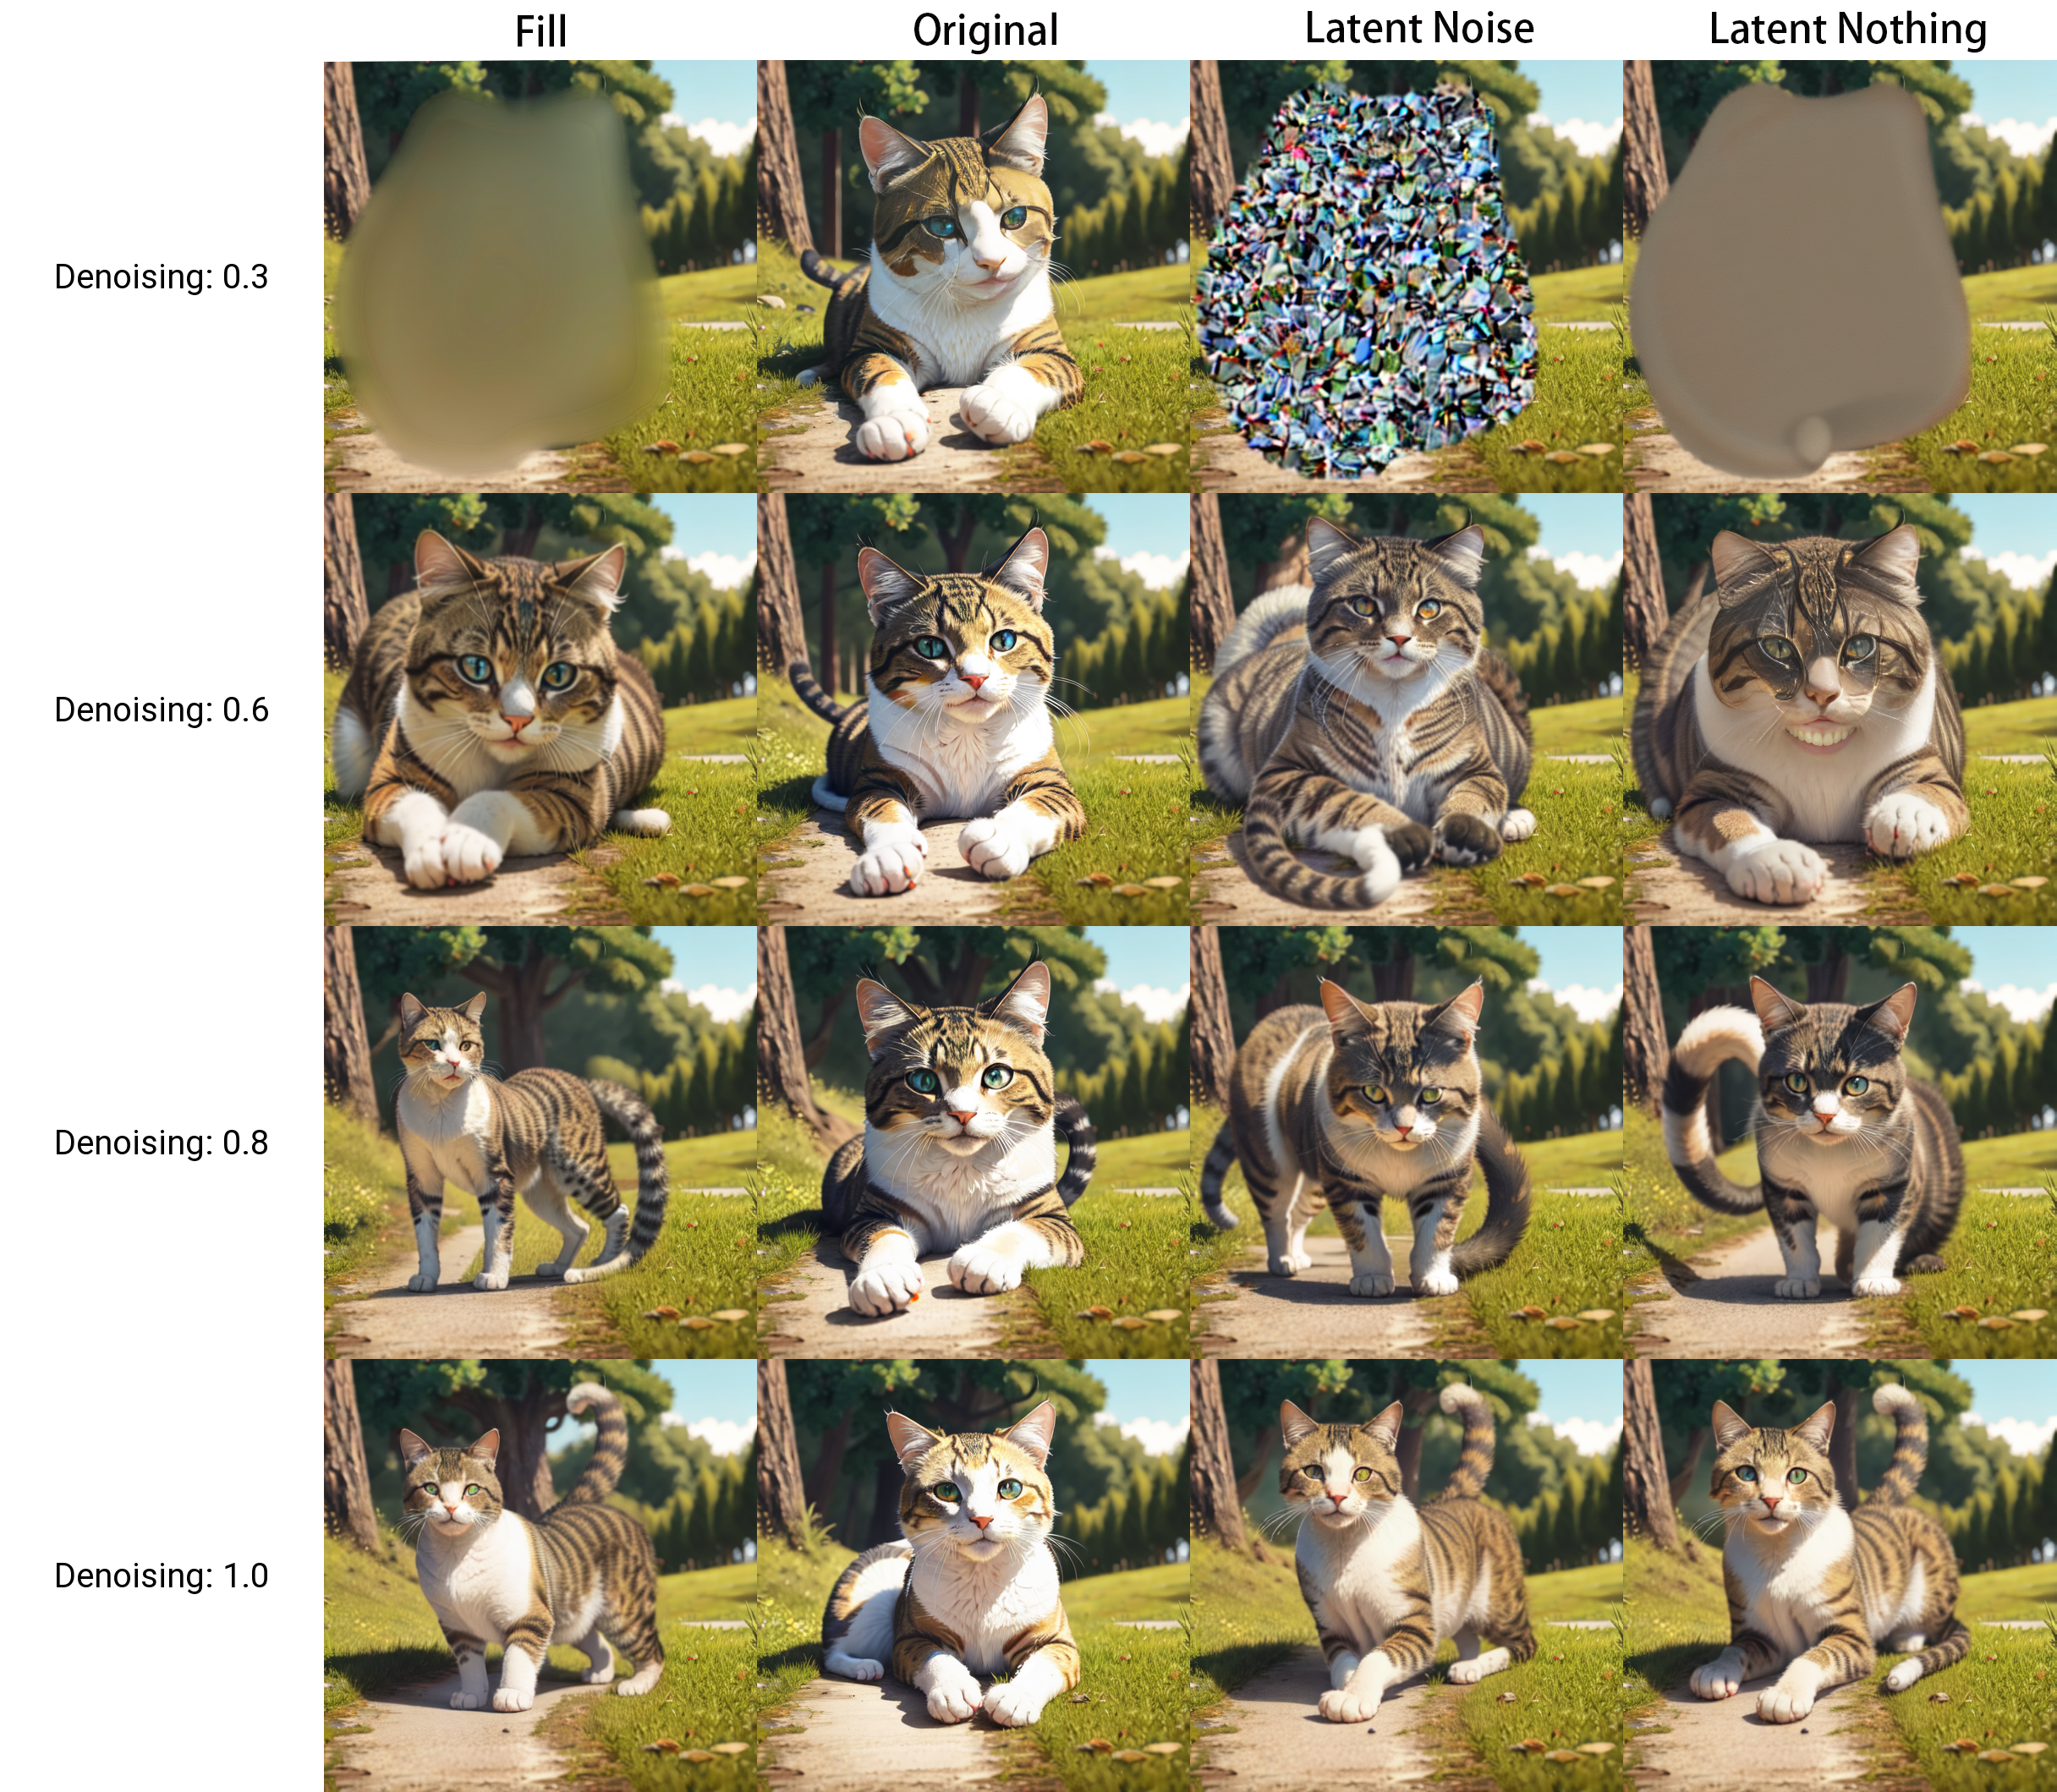
简单总结:如果想要出图效果更多的参考原图内容,选择原图(original)填充;如果想让AI发挥想象力,那选择潜在噪声(latent noise)或者无潜在空间(latent nothing),像平衡一下的选择填充(fill)。
当然,这还需要小伙伴们深入研究开发出更多用法,比如配合不同的修复方式,使用哪种效果更好。举个例子:如果删除删除物品,哪种方式更好;茶杯换成咖啡杯,用哪种方式更好;添加物品,用哪种方式更好。等等。
要有小伙伴在这方面有大量经验的,分享给趣闻屋啊。比心~
局部涂鸦绘制(Inpaint Sketch)
局部涂鸦绘制(Inpaint Sketch),在局部绘制的基础上增加了调色板,使得AI在局部绘制的基础上多考虑了色彩值,也可以分不同颜色多区域同时绘制。
举个栗子(趣闻屋啥没有,栗子最多!):
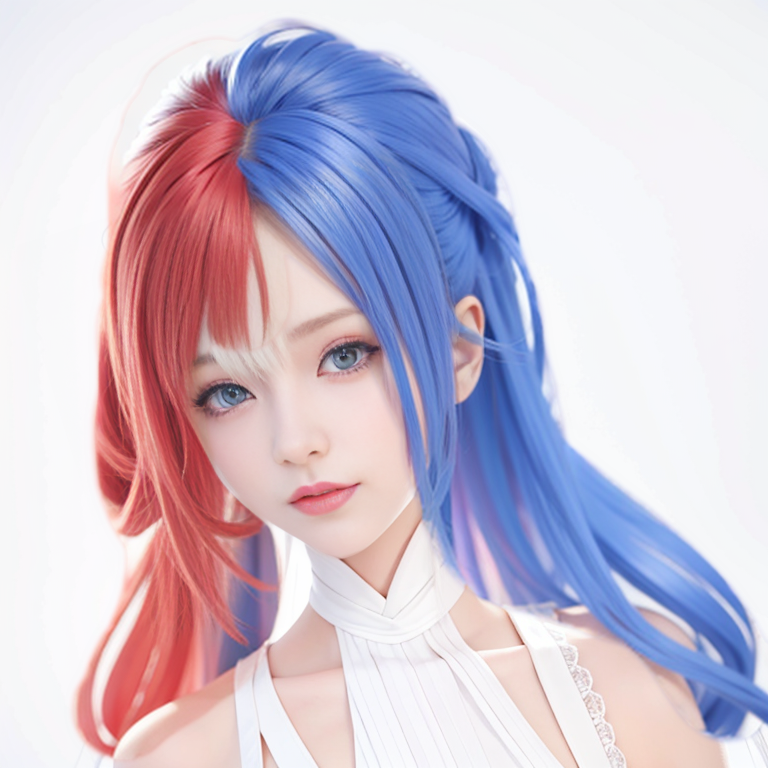
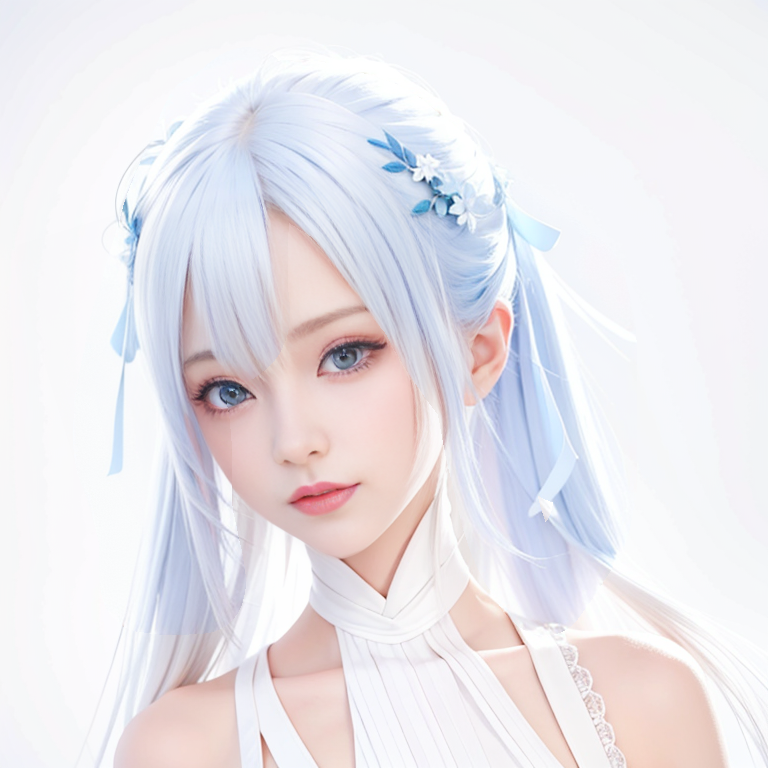
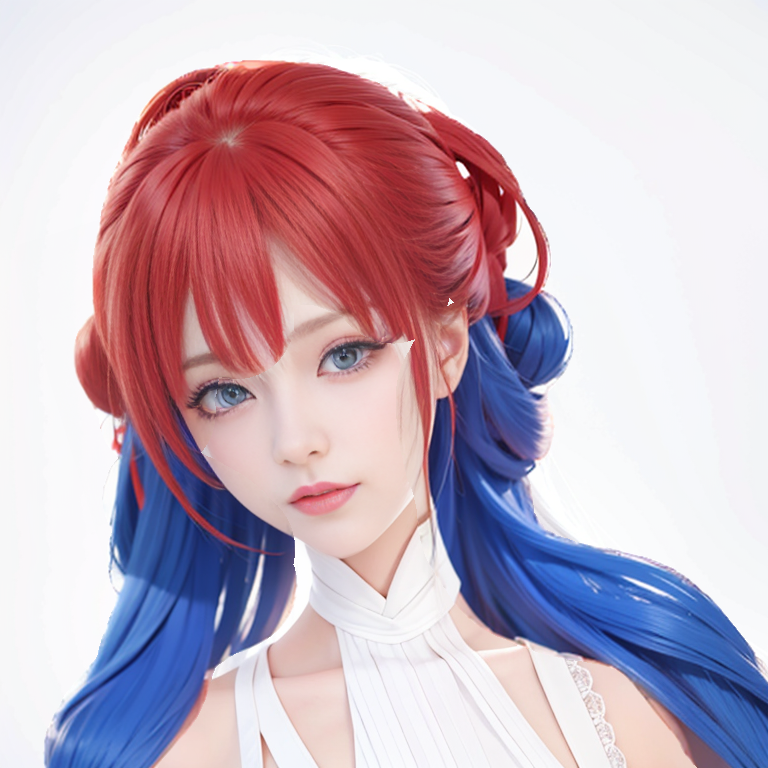
栗子:我们来绘制两种颜色的头发。
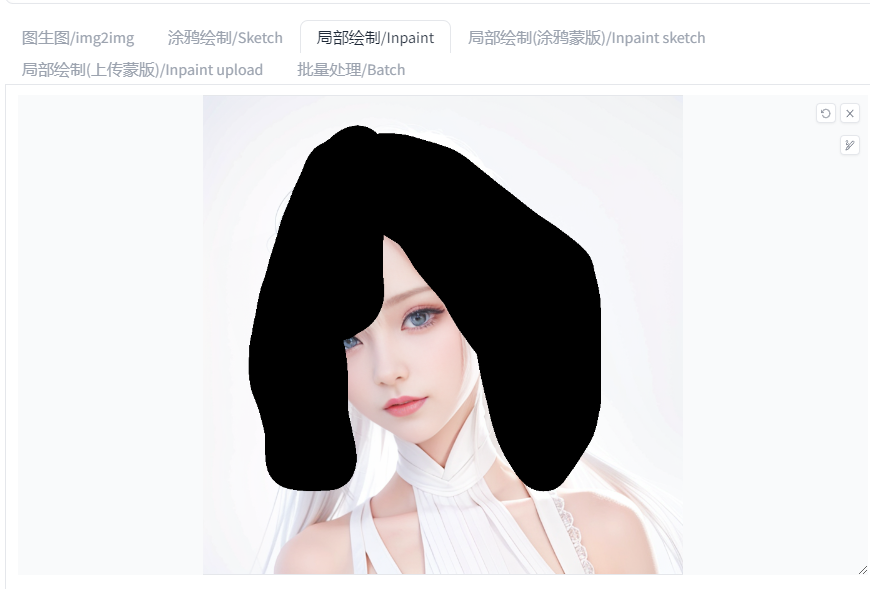
到小姐姐上场了:
我们先用局部绘制(Inpaint)给小姐姐绘制两种颜色的头发,看看有什么惊喜。
蒙版图:
参数设置:
(masterpiece:1.0), (best quality:1.0), (ultra highres:1.0) ,(8k resolution:1.0),(realistic:1.0),(ultra detailed1:0), (sharp focus1:0), (RAW photo:1.0),simple background,
beautifull woman,cute,solo focus, long hair,red hair, blue hair,Negative prompt:
(easynegative:1.2), (worst quality: 1.2), (low quality: 1.2),nsfw,by < bad_prompt_version2:0.8>
Steps: 25, Sampler: Euler a, CFG scale: 7, Seed: 1141467851,
Face restoration: CodeFormer, Size: 768x768,
Model: Guofeng3_v33,
Denoising strength: 0.6,
Mask blur: 0
得到:
不太满意,只有蓝色,没有红色。提示词加上权重:

效果:

有点那个意思了,但也多了一些额外东西,太随机。
要是能控制颜色区域就更好了。
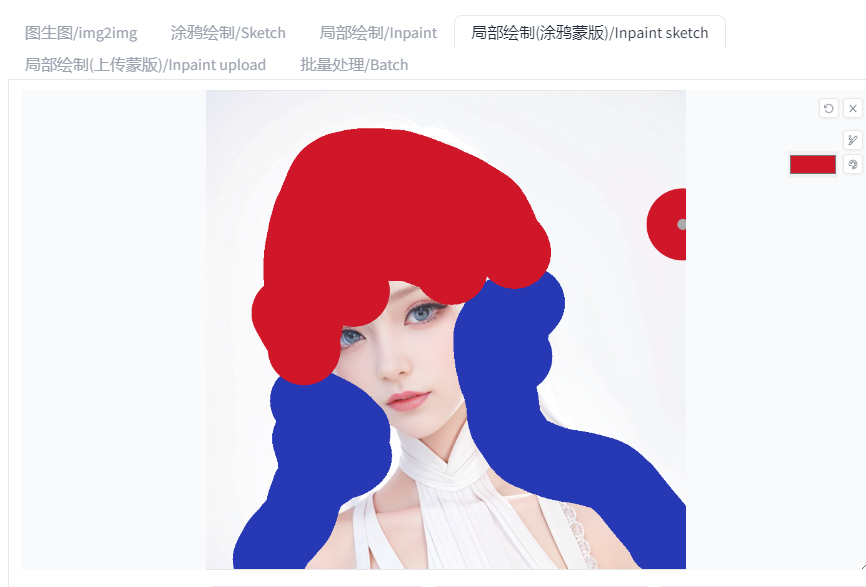
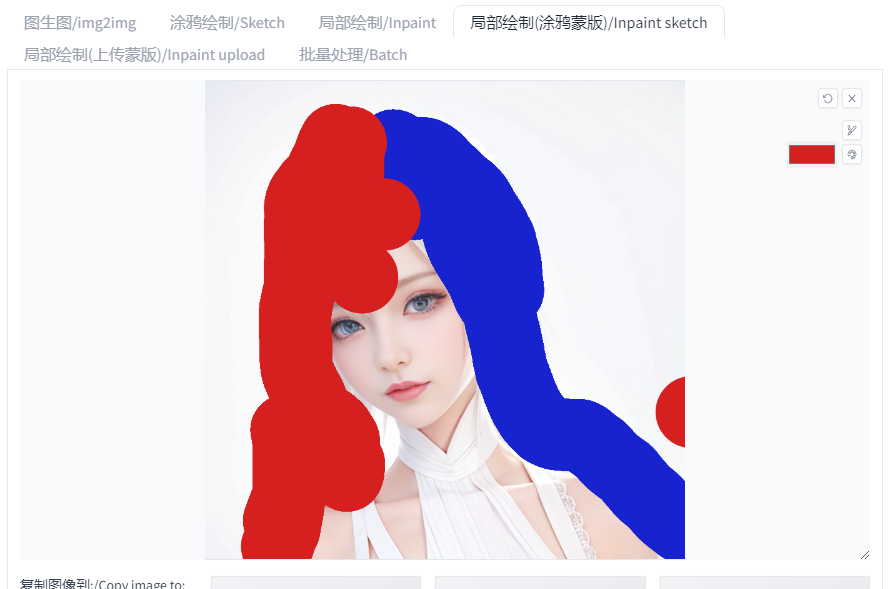
赞!没错。局部涂鸦绘制(Inpaint Sketch)可以达到这样的目的。
看栗子,
涂鸦蒙版图:
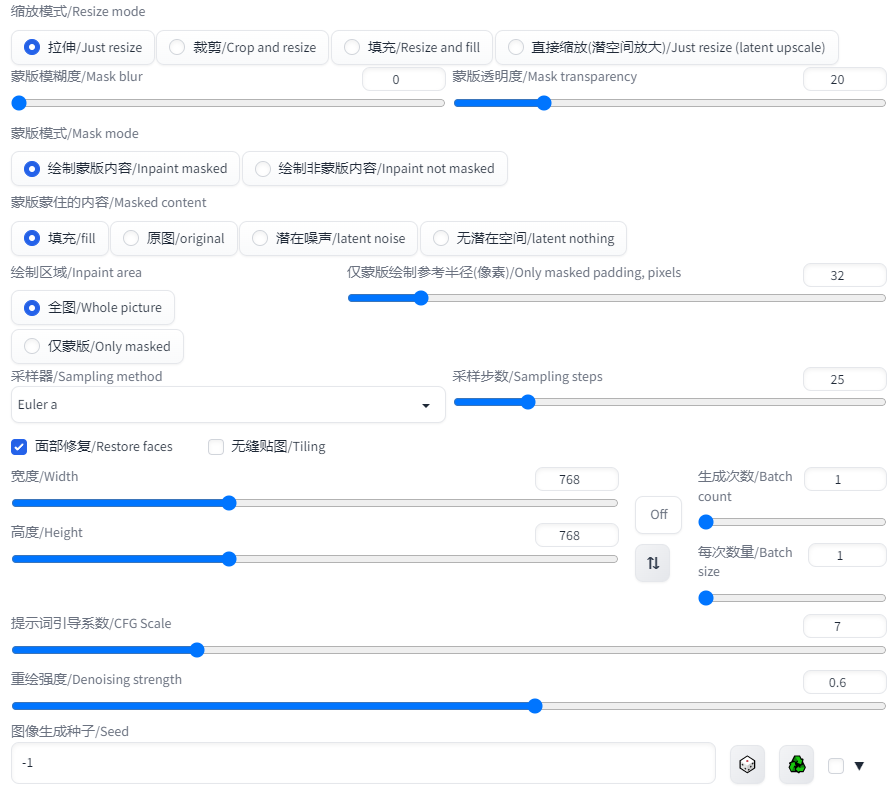
参数设置:
(masterpiece:1.0), (best quality:1.0), (ultra highres:1.0) ,(8k resolution:1.0),(realistic:1.0),(ultra detailed1:0), (sharp focus1:0), (RAW photo:1.0),simple background,
beautifull woman,cute,solo focus, long hair,red hair,blue hairNegative prompt:
(easynegative:1.2), (worst quality: 1.2), (low quality: 1.2),by < bad_prompt_version2:0.8>
Steps: 25, Sampler: Euler a, CFG scale: 7, Seed: 4193238982,Face restoration: CodeFormer, Size: 768x768,
Model: Guofeng3_v33,
Denoising strength: 0.6,
Mask blur: 0
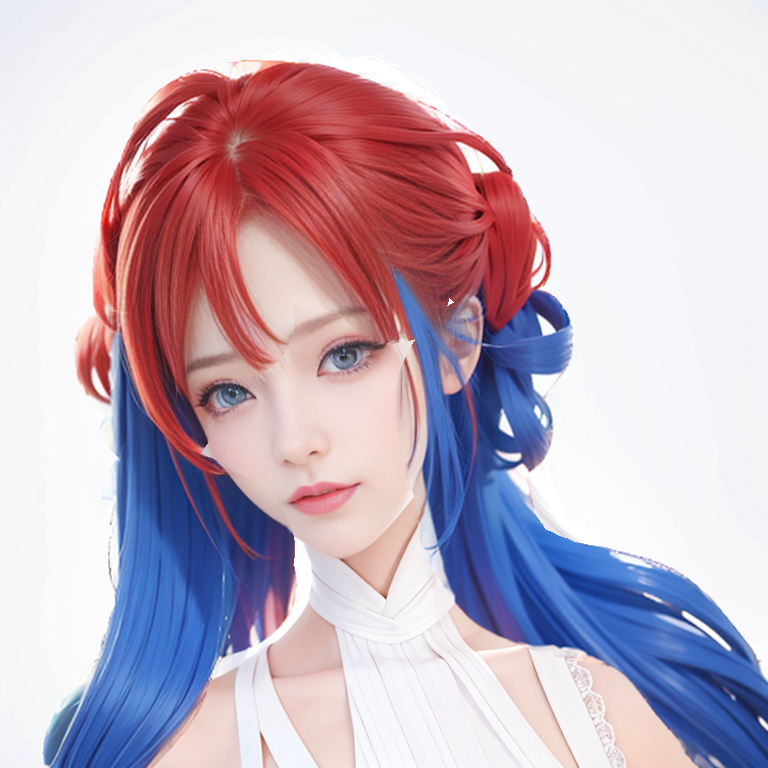
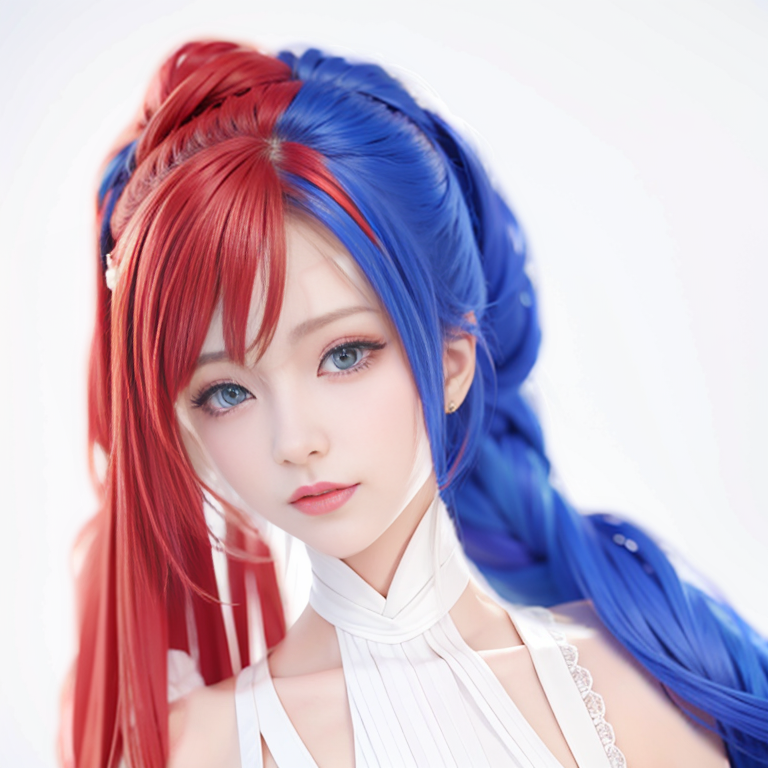
效果:
再有,参数不变,修改蒙版:
得到:
蒙版透明度(Mask transparency),这个比之局部绘制(Inpaint)新增的参数,可以对蒙版透明度施加权重,效果如下:

趣闻屋测试,0-15会有一个从淡到弄的渐进;20左右色彩比较浓烈,贴近蒙版的颜色;30-50会比较有光泽,50开始会变成有一种蒙版的透明感,到100消失。
批量处理(Batch)
批量处理图片,顾名思义就是批量img2img指定目录下的图片。需要建立三个文件夹,原图文件夹、输出图片的文件夹和放置蒙版的文件夹。
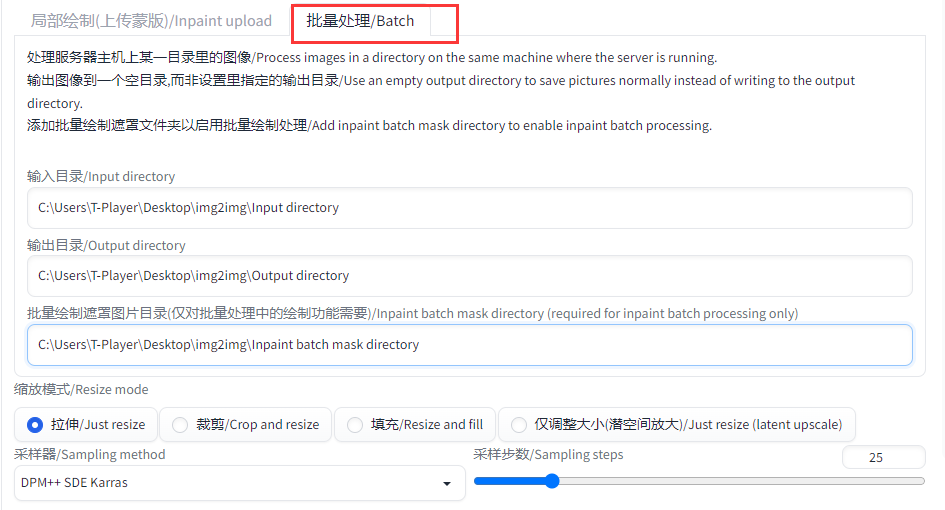
1.原图文件夹、输出图片的文件夹放置需要修改的图片和AI生成后输出的图片。
2.蒙版文件夹路径可选,不设置的话,会以全图的方式进行重绘。
3.蒙版的设定,怎么使得对应的原图选择对应的蒙版?只需要把蒙版图名字写成和原图一样的名字即可。如原图名字:001.png,那么对应的蒙版名字也是:001.png。因为放置在不同文件夹,所以不用担心会冲突。
4.如原图没有对应的蒙版会怎么办?那会以蒙版文件夹里里面的第一张图片当做蒙版。如:原图名字005.png,蒙版文件夹里只有001.png、002.png、003.png。那么005.png就会以001.png作为蒙版进行重绘。
5.技巧:第一张方全白图,也就是全图绘制;如果不需要全图绘制,就把使用最多的蒙版放到第一的位置。
最后
结束!文章很长,能看到这的小伙伴那必须是趣闻屋的最爱!
趣闻屋再次感谢小伙伴们的阅读,有什么补充、问题和纠错,欢迎评论区留言。
古德拜!我们下期见~
(来自AI宇宙的趣闻屋)
大家喜欢趣闻屋的内容,请关注嗷

